
Windows 11 is getting a new “Linked Devices” option to check devices linked to your Microsoft account. Previously, it was only possible via a web browser. Here is how to enable this new feature in your Windows 11 PC and find (and remove) your computers and game consoles linked to your account.
If you have signed in with your Microsoft account to Windows 8.1, Windows 10, Windows 11 computer, and Xbox console, the device will automatically registered into your online account. Not just the name of your device, it will register various information, such as hardware, software, recovery encryption keys, etc., of your device. You can also add and remove devices manually or find if it is missing or stolen.
Table of Contents
How to Check Linked Devices From Windows 11 Settings?
Microsoft added the Linked Devices option to Windows 11 (currently available with the latest preview in the Beta Channel) to find all your computers and game consoles connected to your account.
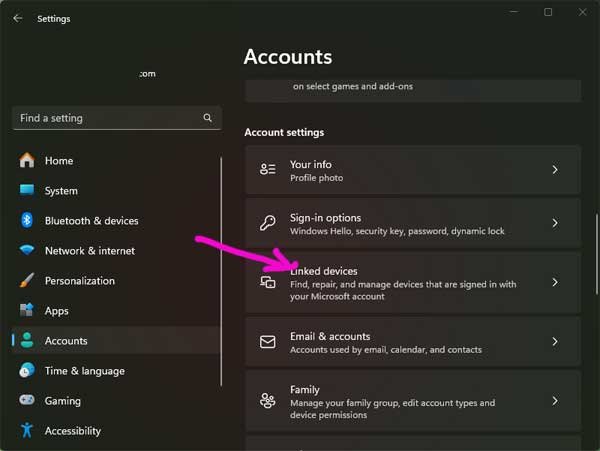
- Open the Settings app on your Windows 11 PC.
- Click on Accounts.
- Click the Linked Devices option.
- On the next page, you can see all your devices linked to your account and options like Register a New Device, Find My Device, Remove Device, and Bitlocker information.
How to Enable Linked Devices Option to Windows 11 Settings Menu?
If the Linked Devices option is missing in your Windows 11 PC, you can force enable it using the Vivetool. Here is how it is.
1. Download the ViveTool zip file from Github (link).
2. Right-click the ViveTool-vx.x.x.zip file and click the Extract All option.
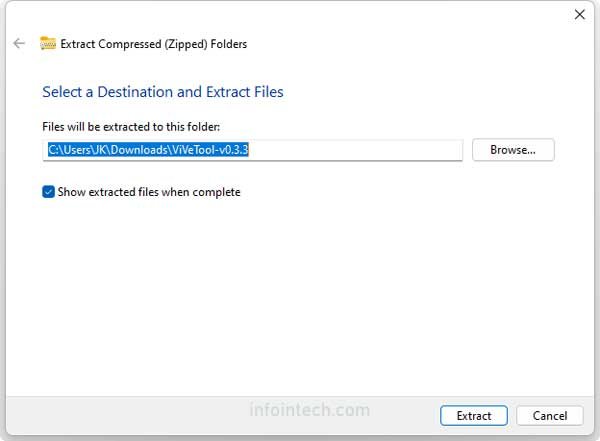
3. Copy the path to the extracted folder.
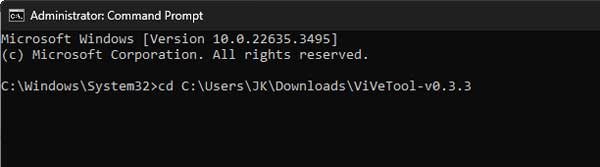
4. Next, open a Command Window as administrator (click Start > type cmd > select cmd run as administrator).
5. Type the following command to navigate to the ViveTool folder and press Enter: cd C:\folder\path\ViveTool-v0.x.x
6. Now, execute the below commands one by one:
vivetool /enable /id:47448915
vivetool /enable /id:48546544
7. Restart the computer.
Note: To revert the above changes, execute the below commands one by one.vivetool /disable /id:47448915
vivetool /disable /id:48546544
Once you complete the above steps, the new Linked Devices option will appear in the Accounts sections of the Settings app. Enter into the Linked Devices section, and manage your devices or register a new device. Note that to manage or add a new device, you may need to go to the Microsoft account website and sign in with your credentials.