Firefox Browser 149 now includes a built-in, free VPN, eliminating the need for separate VPN extensions. The Firefox VPN offers 50 GB of free data per month, allowing you to hide your location and IP address from websites. Mozilla is rolling out the VPN gradually, so it may not be available in all countries immediately. However, you can still enable the VPN in Firefox even if you are in an unsupported country.
In this guide, let us learn how to enable and use VPN in Firefox in an unsupported country. Currently, this feature is available in the US, UK, and Germany, but it is quite easy to enable in any region. Once you enable it, it will appear in the top-right corner of the Firefox browser.
Firefox VPN functions as a browser-level proxy, protecting only traffic within the browser rather than system-wide on your PC. It requires signing up for a Mozilla account to access the free plan, which is distinct from Mozilla’s paid VPN offering.
The free plan provides 50 GB of data per month; once that quota is used, IP protection is paused until the next billing cycle, and there is currently no paid top-up option—waiting for the reset is the only way to regain protection. Availability is currently highly restricted.
Table of Contents
How to Enable VPN in Firefox in an Unsupported Country
1. Open Firefox on your computer, type about:config in the address bar, and press Enter.
2. Firefox displays a warning message about advanced settings. Click “Accept the Risk and Continue” to proceed to the advanced configuration page.
3. Locate the preference search box at the top of the about:config page. Type browser.ipProtection.enabled to filter preferences.
4. Look for the browser.ipProtection.enabled preference.
5. To enable VPN, double-click the preference or click the toggle icon next to browser.ipProtection.enabled to change its value to True.
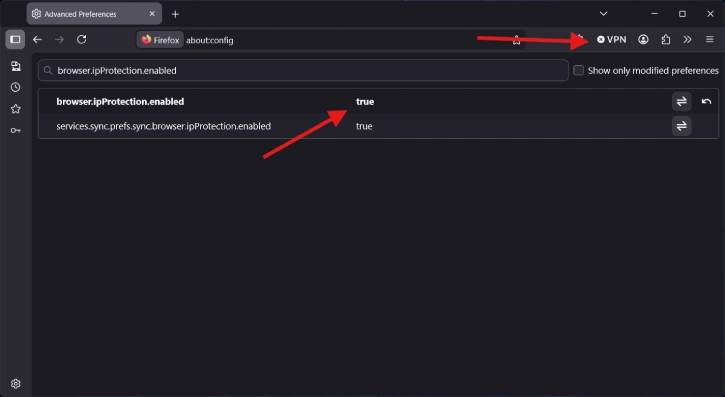
The VPN is now activated, and its icon will be displayed in the top right of the browser.
How to Turn on VPN in Firefox
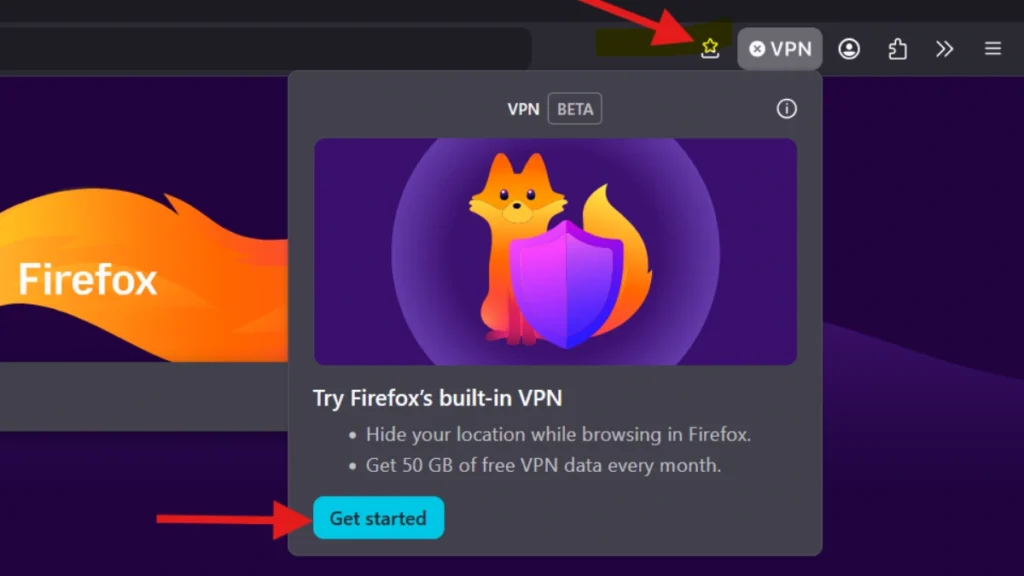
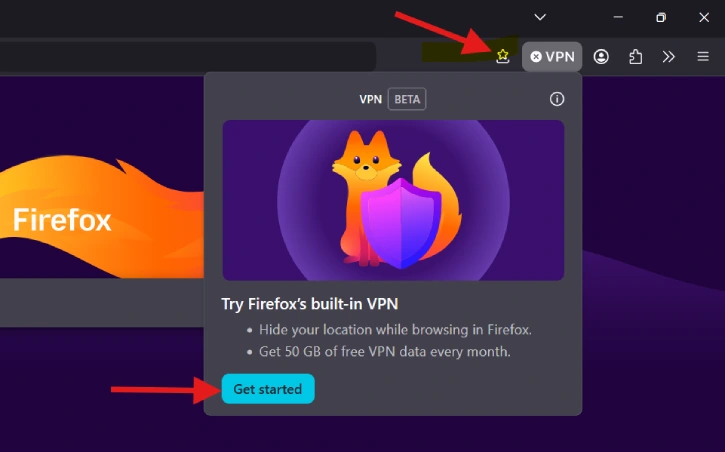
1. Once you unlock the VPN in an unsupported country, click on the VPN icon shown at the top right corner.
2. Next, click on “Get Started” and log in with an email address.
3. Now click on “Turn on VPN.”
You can now browse the internet while hiding your real location and IP address. I noticed there is no difference in browsing speed whether the VPN is enabled or disabled. Now, let us learn how to add a website to the Firefox VPN blacklist if you don’t want to use the VPN for that website.
How to Add Web Sites to Firefox VPN Blacklist
- Launch Firefox, enter
about:preferences#privacyin the address bar, and press Enter. - In privacy settings, scroll down and click on “Manage Website Settings.”
- Now type the URL of the website that you want to add to the blacklist and hit “Add.”
- To remove the website from the blacklist, select that site, click on “Remove Website,” and save changes.

Those were the steps to unlock, enable, and use Firefox’s VPN. If you aren’t using Mozilla’s browser yet, would the addition of a free VPN be enough to make you switch? Let us know in the comments below.
Conclusion
Firefox’s VPN is a welcome addition, as it lets you surf the internet while hiding your IP address. However, there is no option to choose a region in Firefox VPN. Other browsers, such as Opera, Brave, and Vivaldi, also offer free VPNs with region-selection options, but in my testing, Firefox VPN is far faster. I found no speed difference whether the VPN was enabled or disabled.