
ChromeOS Flex is a versatile operating system that allows you to run ChromeOS on any compatible device. You can install it on your existing PCs and Macs to bring a new life to your old computer. With 6-second boot-up times and automatic background updates, ChromeOS Flex brings a faster and more secure computing experience.
To install the ChromeOS Flex, you need to create a bootable USB drive, which will require around 12GB of storage space. You can create ChromeOS Flex bootable disk using the Chromebook Recovery Utility extension for Chrome browser.
Table of Contents
ChromeOS Flex Installation Process
Installation of ChromeOS Flex is simple a process. Connect the bootbale USB drive to your device, and turn on the PC and press the boot key.
Select ChromeOS Flex USB drive and follow the instruction to run or install it on your device.
Using ChromeOS Flex
One of the most convenient ways to use ChromeOS Flex is by installing it on a USB drive. This allows you to take your ChromeOS experience with you wherever you go, without the need to install it on your computer’s internal storage.
Once you have successfully booted into ChromeOS Flex from the USB drive, you can enjoy most of the features and functionality of ChromeOS.
ChromeOS Flex offers a user-friendly interface, similar to the ChromeOS experience on Chromebooks. You can sign in with your Google account to access your bookmarks, settings, and other personalized features.
How to Format ChromeOS Flex Bootable USB Drive?
If you no longer need ChromeOS Flex on the USB drive or want to use it for other purposes, you can format the drive. Formatting will erase all the data on the USB drive, so make sure to back up any important files before proceeding.
Unfortunately, right-clicking on the drive in the File Explorer (Windows) or Finder (Mac), and selecting the “Format” option will not work with CromeOS Flex bootable USB drive.
Follow the instruction below to format a ChromeOS Flex bootable drive.
Step 1: Install the Chrome Recovery Utility extension (download) on your Chrome browser and launch it.
Step 2: Connect your ChromeOS Flex bootable USB drive to your computer.
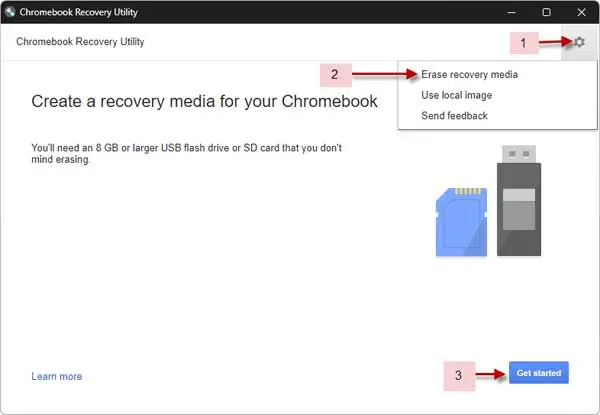
Step 3: Click the Settings (gear-like icon), select the Erase Recovery Media option and click the Continue button.
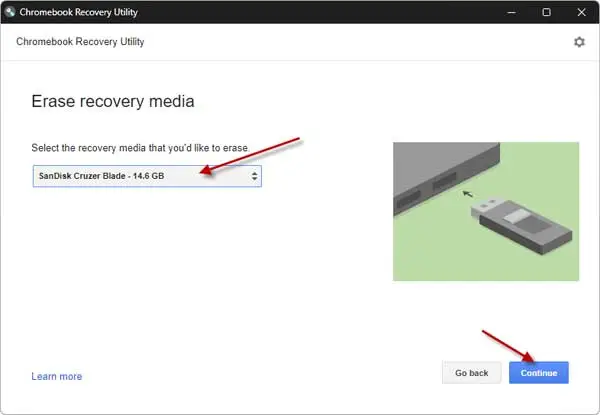
Step 4: Next, click the drop-down menu, select ChromeOS Flex bootable USB, and click the Continue button.
Step 5: Next, click the Erase Now button to delete ChromeOS Flex media from the drive.
Step 6: Now, format the USB drive from your Windows or Mac.
Conclusion
In conclusion, installing and using ChromeOS Flex on a USB drive is a convenient way to experience ChromeOS on any compatible device. With easy installation steps and a user-friendly interface, you can enjoy the benefits of ChromeOS Flex wherever you go.