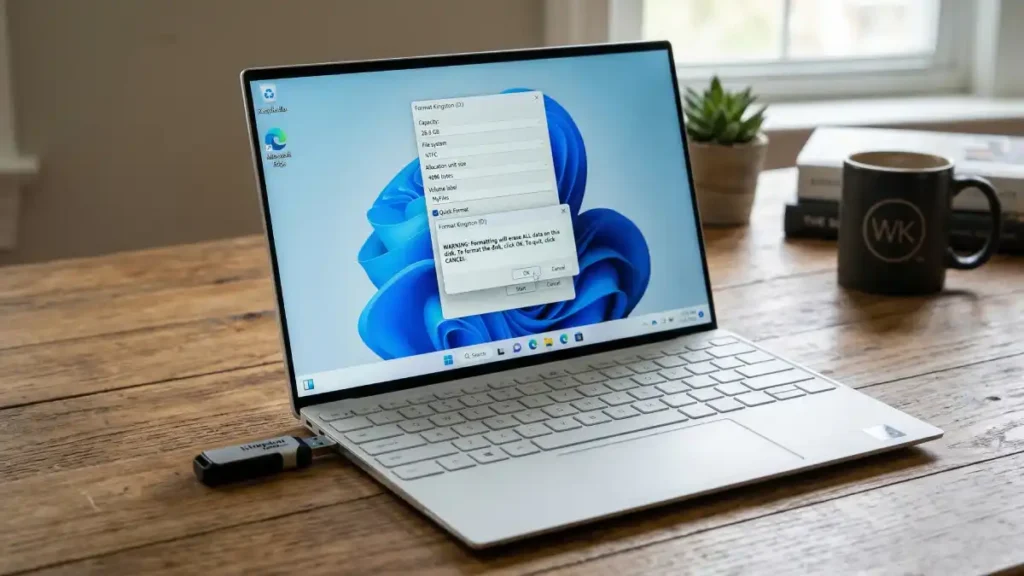
A bootable USB drive is incredibly useful for installing operating systems or running recovery tools. However, once you’re done with it, converting it back to normal storage can be tricky. Many users encounter “write protected” errors when attempting to format a bootable USB drive using standard Windows methods.
The good news? There are three reliable methods to restore your bootable USB drive to full, usable storage capacity. This guide walks you through each approach, from the most effective (Command Prompt) to user-friendly alternatives.
Table of Contents
Step-by-Step Instructions to Format a Bootable USB Drive Back to Normal Storage
Method 1: Using Command Prompt (Recommended)
Command Prompt is the most reliable method for completely removing hidden boot partitions and restoring your drive to its original capacity. This approach uses Diskpart, a built-in Windows tool that can handle complex disk configurations.
Step 1: Open Command Prompt as Administrator: Right-click the Start menu and search for “cmd” (Command Prompt). When you find it, right-click the Command Prompt app and select “Run as administrator.” A window will open – this is where you’ll type commands.
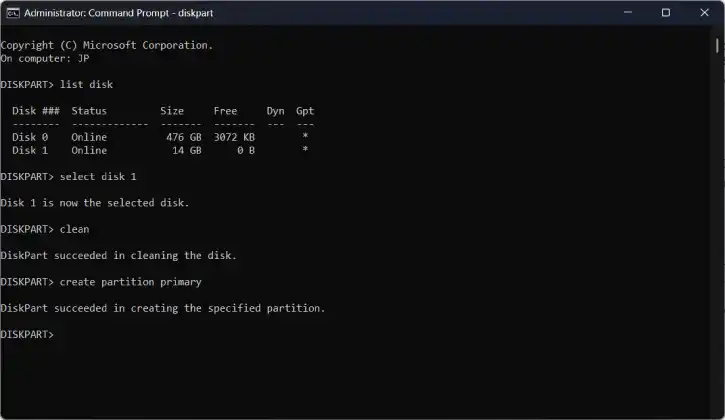
Step 2: Start the Disk Management Tool: Type the following and press Enter: diskpart
You’ll see the prompt change to show you’re now in the disk management tool.
Step 3: Find Your USB Drive: Type the following and press Enter: list disk
A list of all your drives will appear. Look for your USB drive by its storage size (for example, if your USB is 32GB, find the disk that shows 32GB). Write down the disk number next to it—it will look like “Disk 2” or “Disk 3”.
Important: Double-check this number. If you select the wrong disk, you’ll erase your computer’s main drive.
Step 4: Select Your USB Drive: Type the following (replace the x with your disk number) and press Enter: select disk x
For example, if your USB is “Disk 2,” type select disk 2.
Step 5: Erase Everything on the Drive: Type the following and press Enter: clean
This removes all files, partitions, and boot information from your USB drive.
Step 6: Create a New Storage Space: Type the following and press Enter: create partition primary
This sets up a new partition (storage area) on your USB drive.
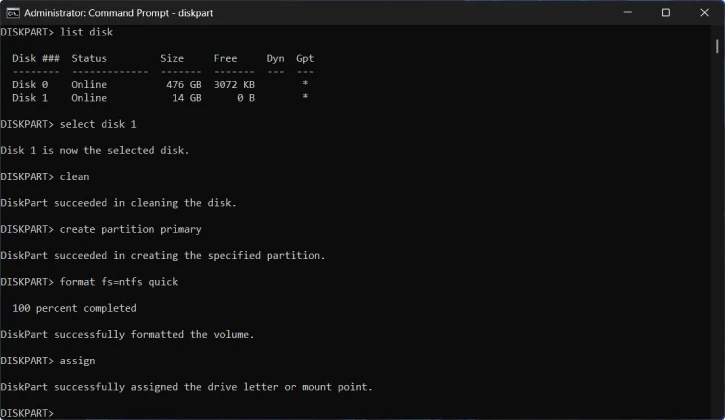
Step 7: Format the Drive: Type one of the following and press Enter: For modern computers: format fs=ntfs quick
For broader compatibility with older devices: format fs=fat32 quick
This prepares the drive for storing files. NTFS is faster and better for large files; FAT32 works with almost all devices but has a 4GB file size limit.
Step 8: Give Your Drive a Letter: Type the following and press Enter: assign
This makes your USB drive appear in File Explorer so you can see and use it normally.
Step 9: Exit the Tool: Type the following and press Enter: exit
You’re done! Your USB drive is now formatted and ready to use.
ALSO READ: How to Format ChromeOS Flex Bootable USB Drive
Method 2: Using Rufus
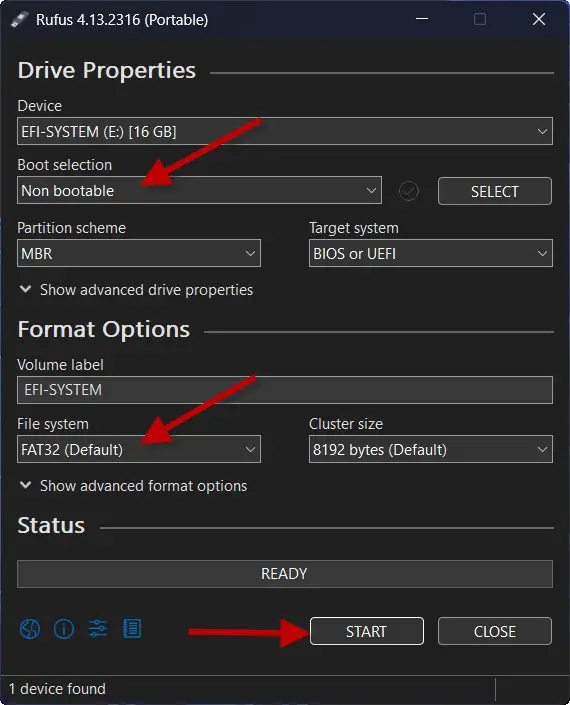
Rufus is an excellent option if you originally created the bootable drive with this application. It’s user-friendly and handles the reformatting process automatically.
Steps:
- Download and open Rufus (if you don’t have it installed).
- Select your USB drive from the device list.
- Under “Boot selection,” choose “Non bootable” to remove bootable functionality.
- Set the file system to FAT32 or NTFS depending on your needs.
- Click Start to begin the wiping and reformatting process.
- Rufus will complete the conversion quickly, and your drive will be ready for normal use.
Method 3: Using Windows Disk Management
Windows Disk Management is a built-in graphical tool, though it’s less recommended because it may not fully remove all boot partitions. Use this method if you’re uncomfortable with Command Prompt.
Steps:
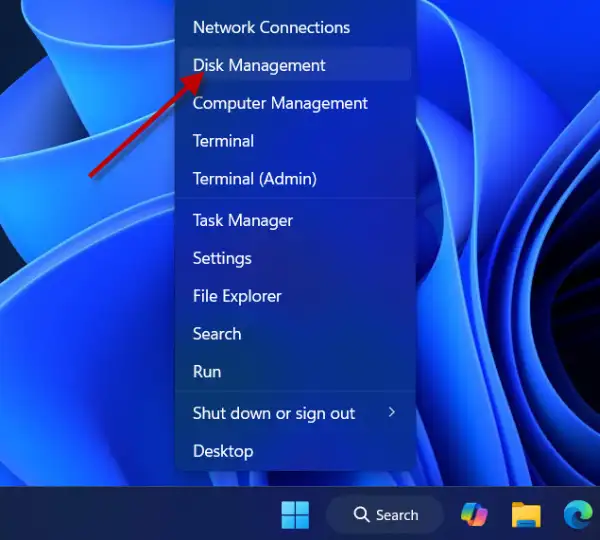
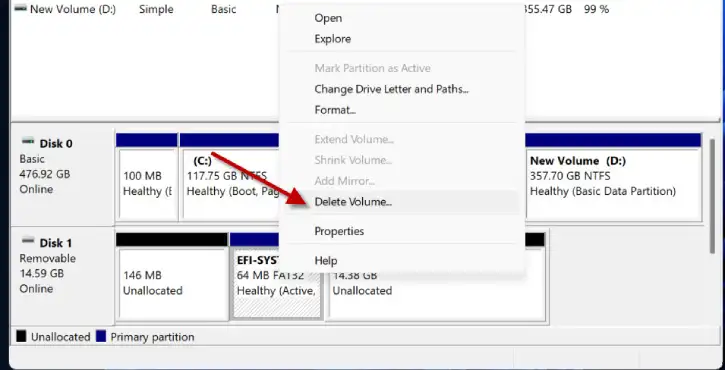
1. Right-click the Start button and select Disk Management.
2. Locate your USB drive in the list of drives.
3. Right-click each partition on the USB drive and select Delete Volume until the entire drive shows as “Unallocated”.
4. Right-click the unallocated space and select New Simple Volume.
5. Follow the prompts to complete the formatting process.
ALSO READ:5 Ways to Disable USB Ports on Windows 11
Which Method Should You Choose?
Use Command Prompt if you want the most thorough cleaning and don’t mind using the command line. It’s the most reliable for stubborn bootable drives.
Use Rufus if you’re comfortable with graphical interfaces and originally created the bootable drive with this tool.
Use Disk Management if you prefer a visual approach, but be aware it may not remove all boot-related data.
Final Thoughts
Reformatting a bootable USB drive doesn’t have to be complicated. With any of these three methods, you can quickly restore your USB drive to full storage capacity and repurpose it for regular file storage or backups. The Command Prompt method is most thorough, but all three approaches will get the job done effectively.