
Windows 11 comes with several multitasking capabilities to enhance the user experience, and the latest addition is the Resume option. Available with the latest Windows 11 build, the Resume feature allows you to start work on one device, such as your PC, and complete it on another device, like your phone.
Table of Contents
Overview of the Resume Feature in Windows 11
The new Resume feature in Windows 11 is similar to Handoff feature of Apple devices. On Apple devices, Handoff allows users to initiate work on one device, such as an iPhone, and continue the activity on a nearby devices, such as a Mac or iPad seamlessly.
Similarly, in Windows 11, Resume feature enables users to begin working, for example, editing a document, on a phone or tablet and then transition effortlessly to a PC, or vice versa. However, the Resume feature currently integrates with Microsoft’s OneDrive only.
The Resume feature is being gradually rolled out to Windows 11 users, so it may take several weeks to reach all devices. To enable this functionality, ensure that your system is updated to the latest version of Windows 11.
How to Enable Resume Feature in Windows 11
1. Open the Settings app on your Windows 11 device.
2. In the Settings window, select the “Apps” option from the left-hand sidebar.
3. Scroll down to the bottom of the right-hand pane and click on “Resume.”
4. On the Resume screen, enable the feature by toggling it on.
5. Next, select the specific apps (here OneDrive) you would like to utilize with the Resume feature.
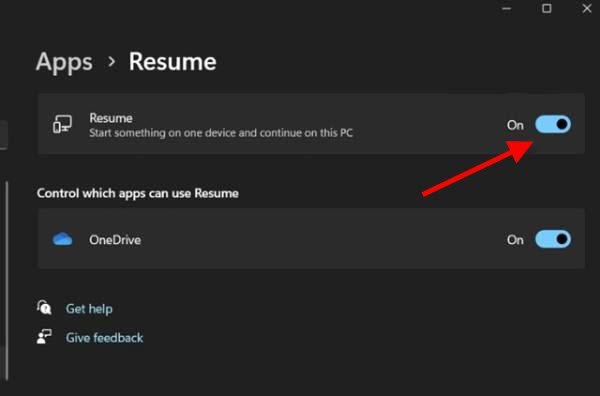
Currently, the feature is exclusively compatible with OneDrive. Please bear in mind that as this feature is still under development, it may not be available on all devices at this time.
This article provided an overview of the Resume feature in Windows 11 along with detailed instructions on how to enable it. If you find this guide useful, kindly share it with others.