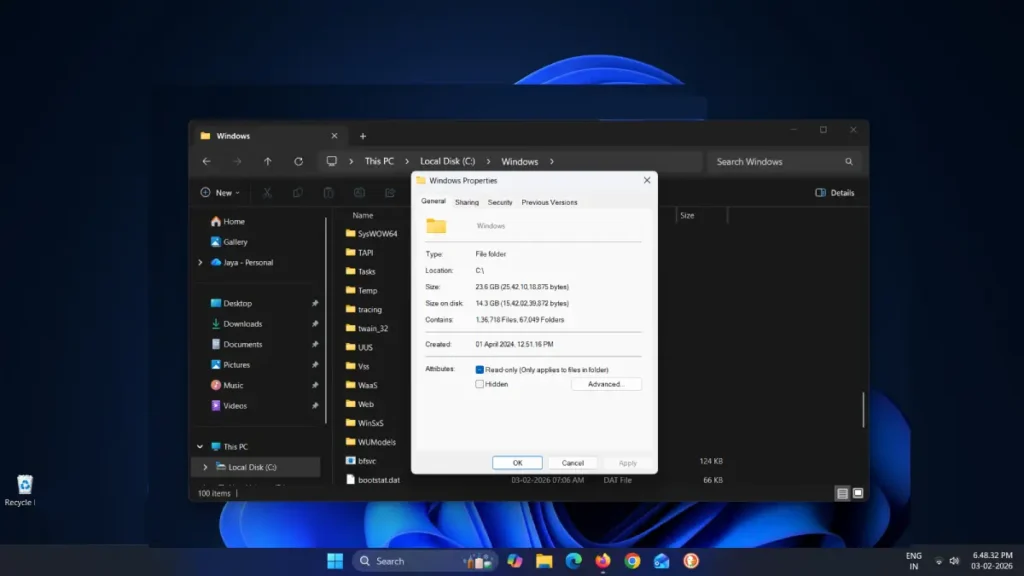
Windows’ WinSxS folder often looks enormous in File Explorer — sometimes 10–20+ GB — and that can make anyone panic when they’re low on SSD space. Before you reach for the delete key, know this: the folder contains essential Windows components and uses hard links, so the size File Explorer reports is misleading. This post explains what WinSxS actually stores, how to check the real disk usage, and safe, built-in ways to trim it without breaking Windows.
You’ll learn three safe cleanup options (Disk Cleanup, DISM /StartComponentCleanup, and DISM /ResetBase), how to analyze the component store size, and a couple of quick tips to automate or trigger maintenance. Follow these steps and you can reclaim space without risking system stability.
Table of Contents
What WinSxS is — and why it looks so big
WinSxS (Windows Side-by-Side) stores system components, old versions of DLLs and files needed for updates, rollbacks, and compatibility. Windows uses hard links to reference many files from multiple locations without duplicating the data. File Explorer counts hard-linked files multiple times, so the folder size it shows is usually much larger than the actual disk space used.
How to check the real size of the component store
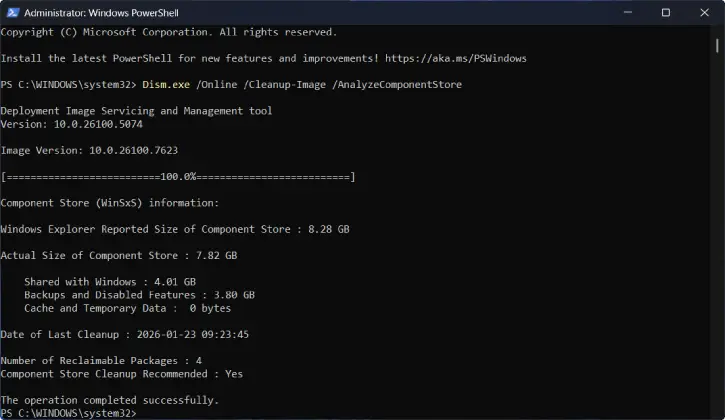
1. Open PowerShell as Administrator and run: Dism.exe /Online /Cleanup-Image /AnalyzeComponentStore
2. Wait for the output and look for Actual Size of Component Store.
3. That number is the real disk usage. Typical healthy systems show ~5–10 GB. If it’s significantly larger, cleanup is reasonable.
Use Disk Cleanup Tool to Clean WinSxS Folder (Safest and recommended for most users)
Disk Cleanup uses Windows’ built-in logic to remove only files that are no longer needed.
1. Press Windows key, type Disk Cleanup, and open it.
2. Select your system drive (C:) and click OK.
3. Click Clean up system files and select C: again.
4. After the scan, check Windows Update Cleanup and Previous Windows installations (if present).
5. Click OK and confirm deletion.
Disk Cleanup is conservative and safe for general maintenance; it’s ideal if you just want a reliable way to reclaim a few GB.
ALSO READ: Create Disk Cleanup Desktop Shortcut for Specific Drive on Windows 11
Deeper Cleaning with DISM
For more control and a more thorough cleanup, use DISM in an elevated Terminal.
1. Safe deeper cleanup (keeps rollback options): Dism.exe /Online /Cleanup-Image /StartComponentCleanup
2. Aggressive cleanup (removes all superseded component versions permanently — you lose the ability to roll back updates):Dism.exe /Online /Cleanup-Image /StartComponentCleanup /ResetBase
The /ResetBase option reclaims more space but is irreversible. Both commands can take several minutes to complete.
Use Task Scheduler to clean the WinSxS Folder
Windows runs a conservative cleanup automatically during idle time via Task Scheduler.
1. To run it manually, open Task Scheduler.
2. Navigate to Task Scheduler Library > Microsoft > Windows > Servicing.
3. Right-click StartComponentCleanup and choose Run.
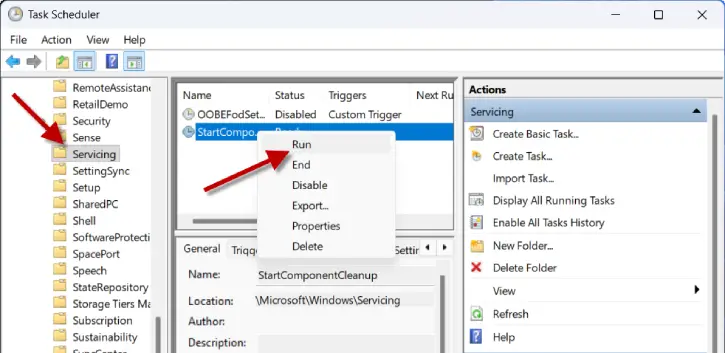
This is a middle ground between Disk Cleanup and running DISM yourself.
Quick tips and final notes
- Don’t delete files manually from C:\Windows\WinSxS — doing so can corrupt Windows and make it unbootable.
- Check component store size only every few months; the folder will always take several GB.
- If you still need more space after cleaning WinSxS, audit installed programs, move large user files to another drive, or use storage sense to offload temporary files.
Summary
- Use AnalyzeComponentStore to see the actual size.
- Run Disk Cleanup (Clean up system files) for the safest result.
- Use DISM /StartComponentCleanup for deeper cleaning and /ResetBase only if you accept irreversible removal of rollback files.
Follow these steps and you’ll safely reclaim SSD space without risking system stability.