

Wireless Android Auto helps users to connect their smartphones wirelessly to vehicle’s infotainment system for easy access to navigation, music, and communication apps without the need for a physical cable. If your car does not have the wireless Android Auto feature, you can make Wireless Android Auto dongle by yourself, or purchase one.
This guide explain all in details on how to make your own Wireless Android Auto dongle. It costs arround INR 2000 (below $20) as of this writing. In this project, we use a Raspberry Pi board with Wi-Fi and Bluetooth support, such as Raspberry Pi Zero W, Raspberry Pi Zero 2 W, Raspberry Pi 3A+ or Raspberry Pi 4, a 4GB microSD card and Wireless Android Auto dongle operating system.
Main Benefits of Making a Raspberry Pi Based Wireless Android Auto Dongle
1. It costs less than INR 2000 (around $20) in India (as of this writing).
2. No third-party app required to install on your phone. Simply enable Bluetooth and Wi-Fi on your phone.
3. It is fast and takes approximately 30 seconds to automatically connect to your car and supports all Android Auto features.
Requirements:
- A Raspberry Pi board with Wi-Fi and Bluetooth support (such as, Raspberry Pi Zero W, Raspberry Pi Zero 2 W, Raspberry Pi 3A+, or Raspberry Pi 4).
- A 4GB or more MicroSD card.
- Wireless Android Auto Dongle OS image file for your Raspberry Pi board. You can download it (32MB) from GitHub. [raspberrypi0w for Raspberry Pi Zero W board/ raspberrypizero2w for Raspberry Pi Zero 2 W board/ raspberrypi3a for Raspberry Pi 3A+ board/ raspberrypi4 for Raspberry Pi 4 board]
- BalenaEtcher app for flashing the AA wireless dongle image file on microSD card. Download from here.
ALSO READ: Play Local Music on Android Auto: How to Use Musicolet to Play Songs from Your Phone
How to Make Wireless Android Auto Dongle Using Raspberry Pi
1. First, download the Wireless AA Dongle image file and the BalenaEtcher app to your computer from the link above.
2. Connect your microSD card to your laptop or PC using a card reader or USB adapter.
3. Next, open the BalenaEtcher app by double-clicking its exe file.
4. Choose the downloaded AA wireless dongle image file, select your SD card, and click the Flash button. This will install the image onto the SD card.
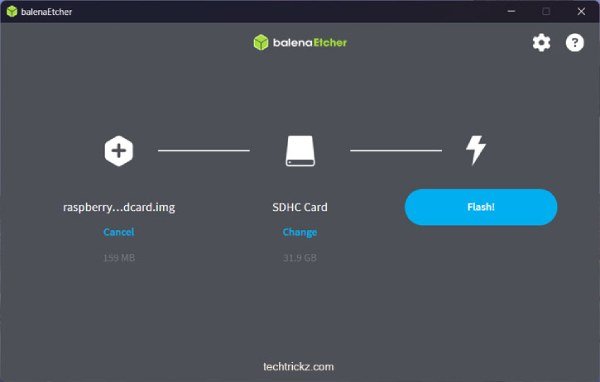
5. Once the process is finished, safely remove the SD card from your computer.
You have now created a bootable SD card for the Android Auto wireless dongle for your Raspberry Pi. Next step is connecting your dongle to your car. Read the instruction carefully.
How to Connect Your Raspberry Pi Based Wireless Android Auto Dongle to Your Car?
1. Insert the flashed microSD card into the SD card slot of the Raspberry Pi board.
2. Next, start your car and connect your Android phone to the car’s head unit using a USB cable. Once Android Auto loads on the head unit, disconnect your phone from the car.
3. Now, connect your Raspberry Pi-based Android Auto Dongle to your car using a micro-USB cable. Wait a few seconds until the green LED light on the Raspberry Pi board becomes stable.
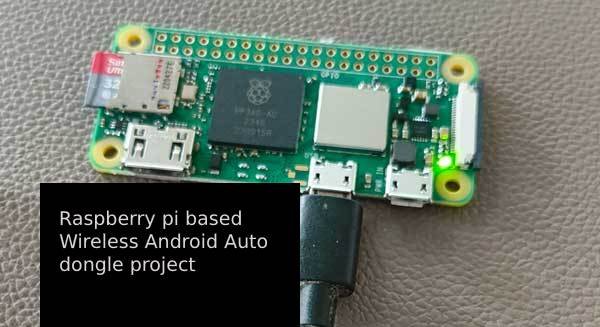
4. Now, on your phone, go to the Bluetooth settings and look for “AndroidAuto-Dongle” or “AA Wireless Dongle.” Tap on it to pair with your phone and grant any necessary permissions.
5. After that, open the Wi-Fi settings on your phone and search for “AAWirelessDongle.” Tap on it to connect. If prompted, enter the password “ConnectAAWirelessDongle” to establish the connection.
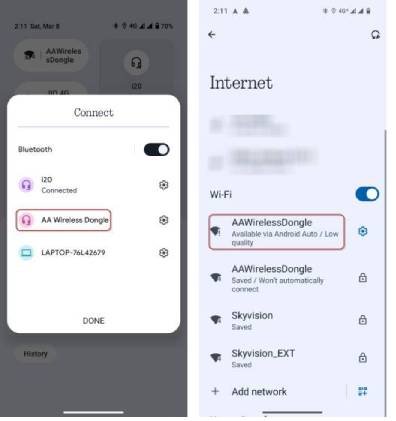
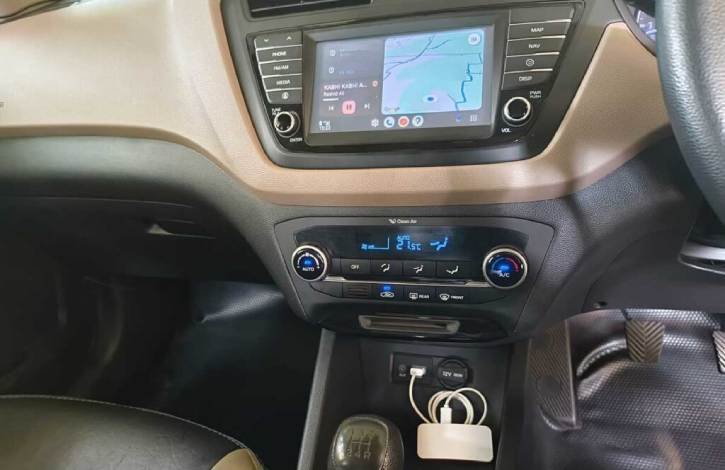
6. Now, Android Auto should appear on your car screen, allowing you to use it wirelessly with all its features.
ALSO READ: Add AI DasCam and ADAS Features to Your Car Using Magic Earth
Note: Once you do the above steps you do not need to connect your phone to car. In the future, your AA Wireless adapter should connect to your car automatically as long as Bluetooth and Wi-Fi are enabled.
Your Wireless Android Auto project with the Raspberry Pi should work right away, but it might not be compatible with all car head units. If your AA Wireless dongle doesn’t work the first time, try turning off your car and then turning it back on. After that, connect to the AAWirelessDongle Wi-Fi and Bluetooth from your phone, and Android Auto should work wirelessly. (Source)

