
There are several reasons you might want to block certain applications from accessing the internet on Windows 11. For instance, you may wish to prevent specific apps from updating, reduce data consumption, or improve privacy by stopping certain applications from sending or receiving information.
This can be particularly useful for applications that may consume excessive bandwidth, track user behavior, or run background processes that are not necessary for your current tasks. By blocking internet access for these apps, you can have more control over your system’s performance and security.
On Windows 11, you can prevent any app from accessing the internet using the built-in Windows Firewall. By creating a new outbound rule for a specific app, you can effectively block its internet access. Here’s how to do it.
This guide lets you know how to block or unlock any app from accessing internet on Windows 11
Table of Contents
Block a Particular App from Accessing the Internet on Windows 11
1. Open the Windows Settings app by using the shortcut key Win + I.
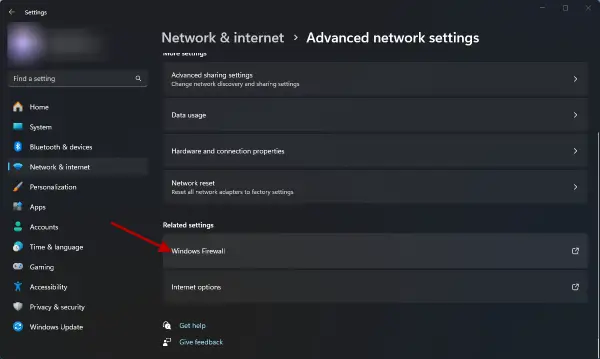
2. In the left sidebar, click on “Network & internet.”
3. Next, select “Advanced network settings,” and then choose “Windows Firewall.”
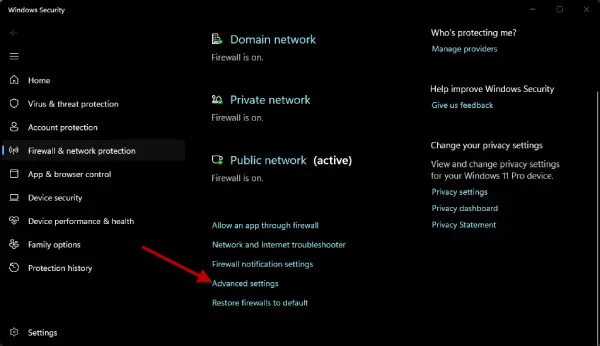
4. Scroll down and click on the “Advanced settings” option.
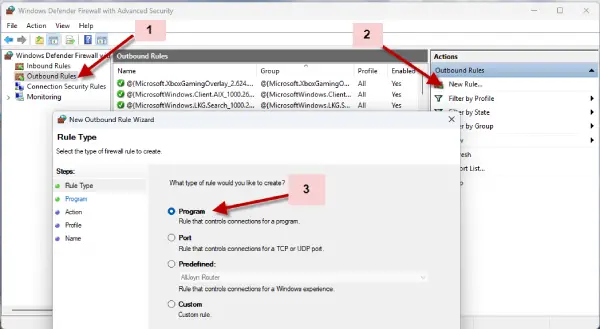
5. In the left sidebar, select “Outbound Rules,” and then click on “New Rule” in the right sidebar.
6. Choose “Program” and click Next.
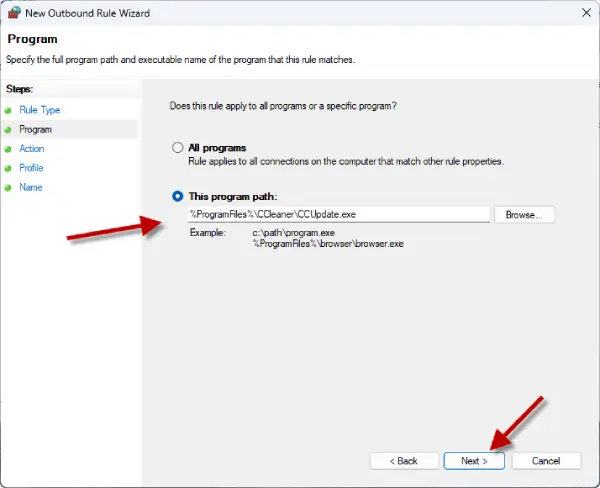
7. Browse to the path of the application you want to block, then click Next.
8. Select the “Block the connection” option and click Next.
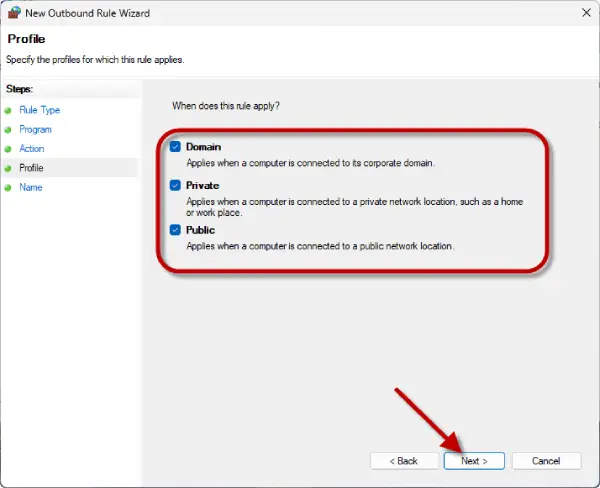
9. On the next screen, check all three options (Domain, Private, and Public), then click Next.
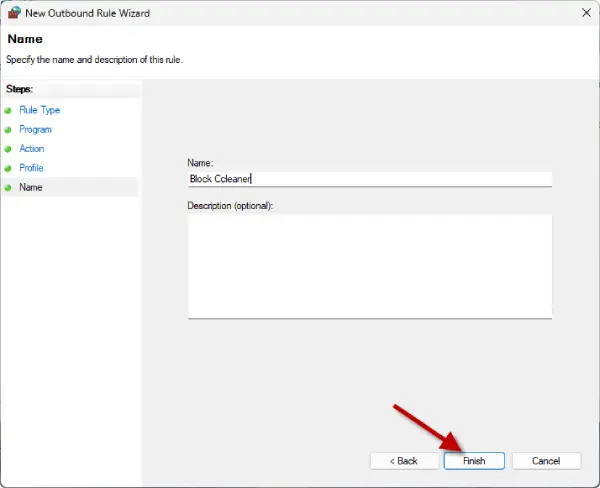
10. Enter a name and an optional description for the program, then click Finish.
Keep in mind that some applications may have multiple methods of connecting to the internet, so you may need to block each method individually. Blocking internet access for these apps allows you to gain better control over your system’s performance and security.
Step-by-Step Guide to Unblock an App’s Internet Access in Windows 11
To allow an app to access the network by removing its restrictions, you can either disable or delete the corresponding firewall rule. Here’s how to do both:
To disable a rule:
Go to Settings > Network & internet > Advanced network settings.
Click on Windows Firewall and then select Advanced settings.
In the left-hand menu, choose Outbound Rules.
Find the rule you want to modify, select it, and then click on Disable Rule.
To delete a rule:
Navigate to Settings > Network & internet > Advanced network settings.
Click on Windows Firewall and select Advanced settings.
Choose Outbound Rules from the left-hand menu.
Locate the rule you wish to remove, select it, and click on Delete Rule.
That is all how to block and unblock apps from accessing internet on a Windows 11 PC. If you have any questions about these instructions, feel free to ask in the comments, and we’ll respond as soon as possible.