

Solid-state drives (SSDs) are the main storage devices of computers now, as they have faster performance and reliability compared to traditional hard disk drives (HDDs). SSDs work without any problems for years, but their health and performance should be checked regularly to prevent any data loss due to unexpected failure.
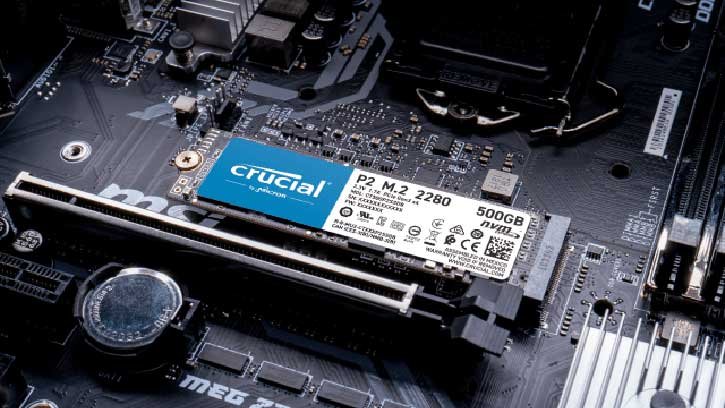
Windows has a built-in tool to check SSD health. Additionally, there are several applications available for checking SSD health. For example, third-party apps like HWiNFO, CrystalDiskInfo, AIDA64 Extreme, and SSD manufacturer applications like ADATA SSD Toolbox, Samsung Magician, etc. can provide a comprehensive report about your SSD’s health.
Here is how to use Windows’ built-in tool and third-party apps to check the health of the SSD in your computer.
How to Check SSD Health Using Windows 11 Built-in Tool?
Windows 11 users can easily check health of their SSD without installing a third-party app. The report will not be comprehensive, but you will get to know about the health.
1. Open the Command Prompt as Administrator on your Windows 11 PC.
2. In Command prompt, type the command WMIC and press enter.
3. Next, type the command diskdrive get status, and hit enter.
4. You will get “OK” or “Pred Fail” result.
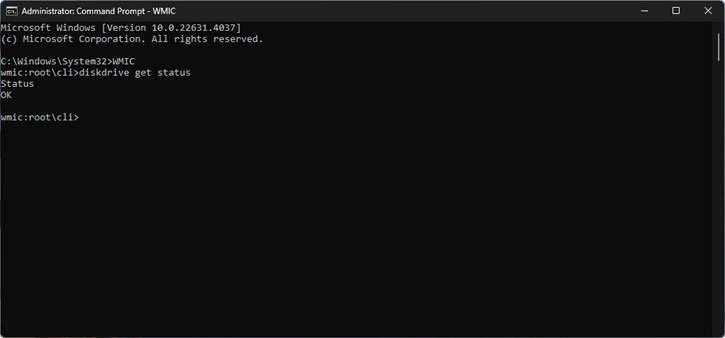
5. If the result is OK, it means your SSD is working properly. If you get Perd Fail, it means your SSD is malfunctioning, and it’s time to back up your data.
Now, if your SSD supports SMART (Self‑Monitoring, Analysis and Reporting Technology), you can run this tool to check its health. Here is how it is.
Checking SSD Health with SMART in Windows PowerShell
SMART (Self-Monitoring Analysis and Reporting Technology) tracks performance indicators and detects potential failures. Regularly checking your drive’s SMART status helps you catch problems before they become critical.
1. Launch PowerShell (or Terminal) with administrator privileges on your Windows 11 PC.
2. Enter the following command and press Enter: Get-PhysicalDisk | Select FriendlyName, MediaType, BusType, HealthStatus, OperationalStatus
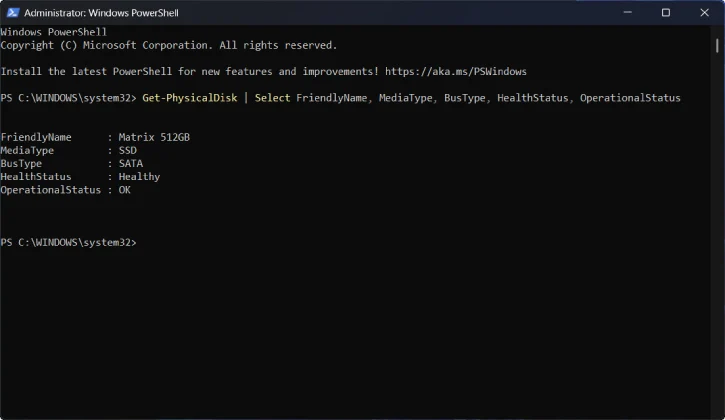
3. A table will appear displaying information about your drives (if they support SMART):
| INFO | DETAILS |
| FriendlyName | The model name of your drive |
| MediaType | The type of drive (SSD, HDD, etc.) |
| BusType | How the drive connects to your computer |
| HealthStatus | Whether the drive is healthy or at risk |
| OperationalStatus | Whether the drive is functioning properly |
4. If HealthStatus shows “Healthy,” your drive is in good condition.
5. Any other status, such as “Warning” or “Unhealthy” indicates issues that needs your attention (backup up your data and considering drive replacement).
Checking your SMART status periodically is a simple but effective way to monitor drive reliability without needing third-party software.
How to Use Third-Party Apps to Check SSD’s Health
Third-party apps, such as CrystalDiskInfo, HWiNFO, AIDA64 Extreme, Samsung Magician, etc. uses SMART (Self-Monitoring, Analysis, and Reporting Technology) to check health of a SSD. By using these apps, you will get a comprehensive report about SSD’s health. For this guide, I’m using CrystalDiskInfo to check SSD.
1. First, download and install CrystalDiskInfo software (link) on your computer.
2. Once you install the app, launch it.
3. The app will show the health score of your SSD along with all important information.
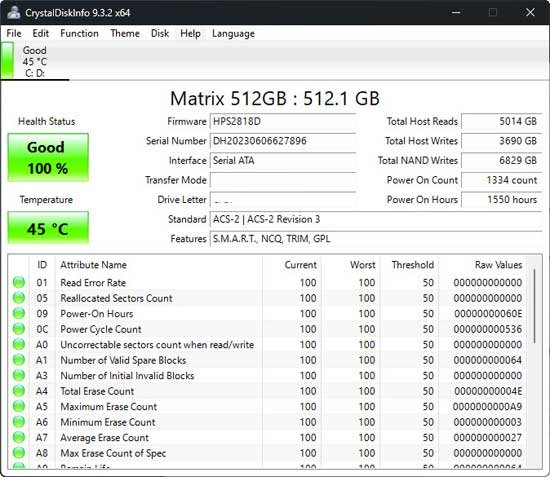
4. The most important thing to check is the Health Status box at the top. As you can see, my drive has a good rating of 100%.
5. Another useful metric is Total Host Writes — in this example it is 3,690 GB. Most SSD manufacturers offer warranties of 100 TBW or more.
6. Power-on Hours is also a useful metric for determining drive health.
That is all how to check health of SSDs on Windows 11. If you get a negative result, it is the time to back up data and replace your SSD.

