

Regular Windows updates keep your PC running safe. Microsoft often releases Windows updates with features, security fixes and bug solutions, but what if your latest Windows 11 update did the opposite? Your system acting oddly with features breaking and overall speed dropping.
The good news is that Windows 11 lets you uninstall updates. That means you can remove the update and maybe undo the changes it made. There are ways to uninstall updates on Windows 11. Below is a guide on how to uninstall an update in Windows 11.
Microsoft mainly releases two types of updates for Windows 11:
- Regular updates: These aims to fix bugs and keeping your system secure.
- Feature updates: These brings new functionalities to your Windows experience.
The good news is that you can uninstall both types of updates, if they’re causing problems on your Windows 11 PC.
First Method:
Uninstall Updates in Windows 11 Using Settings app
1. Press the Windows + I shortcut to open the Settings app on Windows 11.
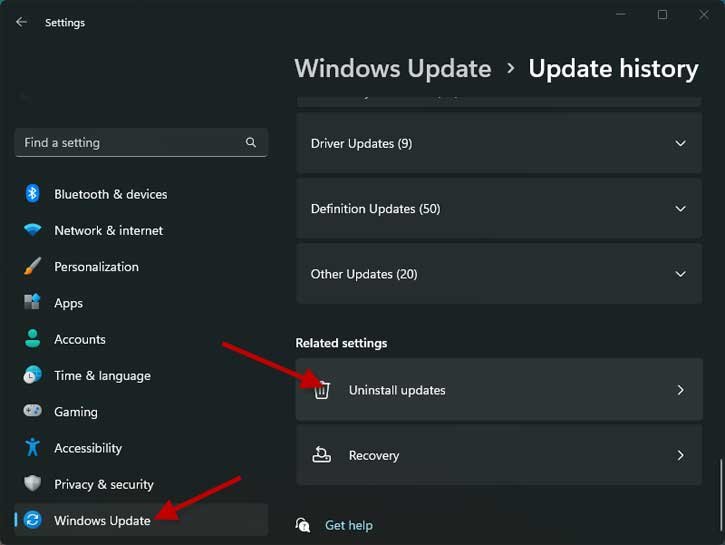
2. Select Windows Update tab on the left, and the on the right-side click on Update History.
3. In Update History page, scroll down to Related setting section and click the Uninstall Updates option.
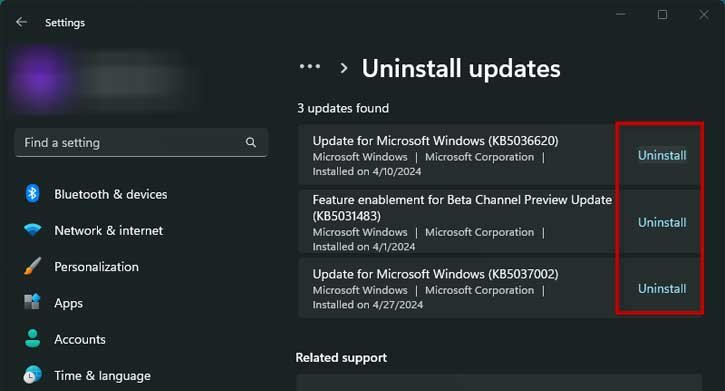
4. You will see a list of recently installed updates.
5. Click on the Uninstall button next to the update that you want to remove.
6. It will remove the selected update from your Windows 11 PC.
Second Method:
Uninstall Windows 11 Updates Using Windows Terminal
You can also uninstall Windows update using the Windows Terminal app. Here is how it is.
1. Press the Windows + X shortcut or right click the Start button and select the Windows Terminal (Admin) option.
2. In the Windows Terminal, type the command wmic qfe list brief /format:table and hit Enter.
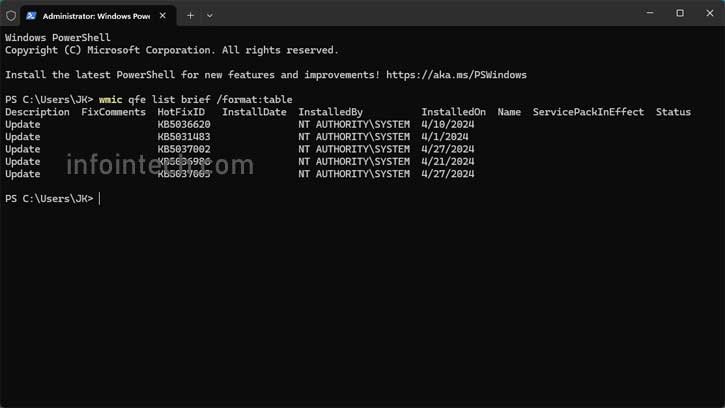
3. It will display a list of all the updates you have recently installed.
4. Note down the KB number of the updates.
5. Now, type the command wusa /uninstall /kb:updateID in the Windows Terminal and press Enter key (replace updateID with the KB number)
6. This command will remove the chosen update from your Windows 11 PC.
Third Method:
Uninstall Updates Using the Advanced Start-up Options
If you cannot access the Settings app or your unable to login to Windows 11 PC after installing an update, you can use the advanced start-up option to uninstall both quality and feature updates.
1. Turn on your PC and press the F8 key before Windows starts.
2. It will boot your PC into Advance Windows Recovery Environment (WinRE).
3. In WinRE, select Troubleshoot option.
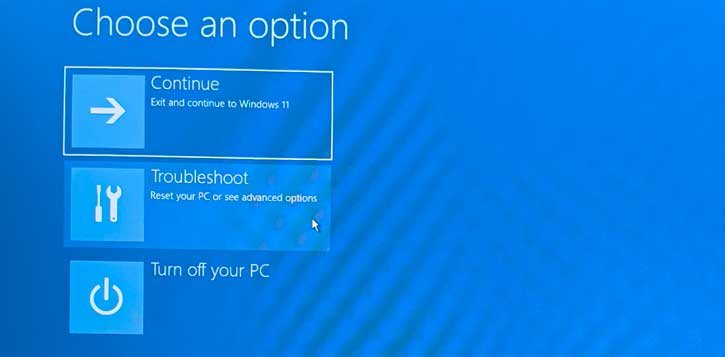
4. Next, and go to Advanced options > Uninstall Updates.
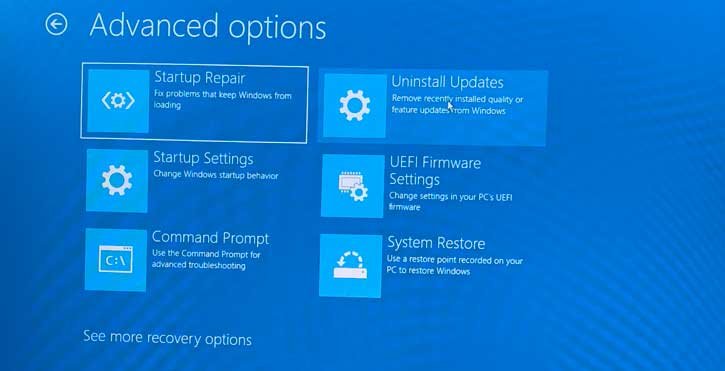
5. Now, select either Uninstall Quality update or Uninstall Feature update.
6. On the next page, confirm the action to uninstall the Windows updates.
7. Once done, you will have successfully uninstalled the update.
These are the available options to uninstall an update in a Windows 11 computer. The last method is more suitable, if cannot login to your PC after an update.

