

Have you seen the Settings app on your Windows 11 close by itself or crash when you try to change some settings? This is a weird problem and many people have reported it. This blog post shows the reasons and the fixes for the Settings app closing by itself or crashing on Windows 11.
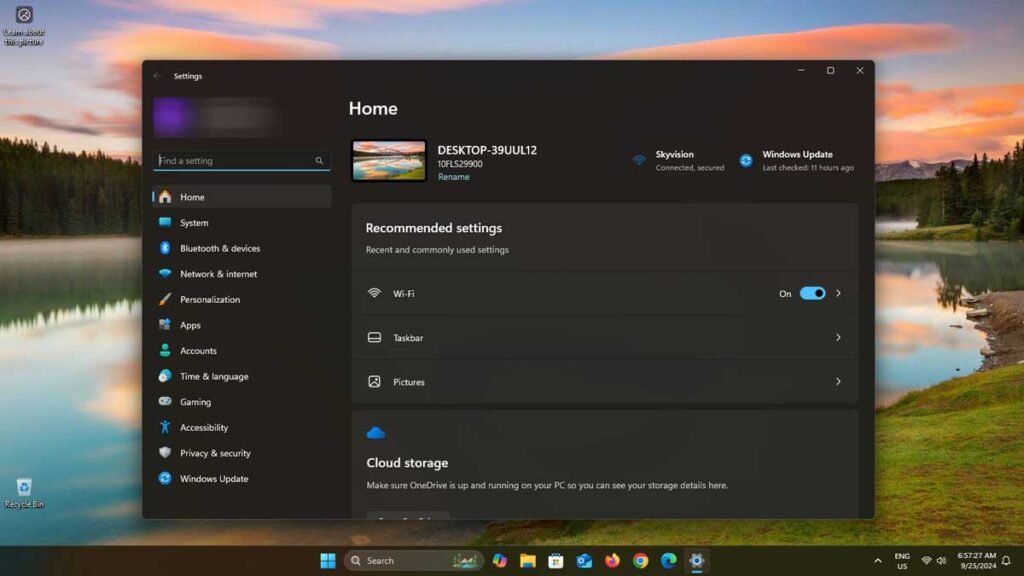
The Settings app on your Windows 11 may sometimes close unexpectedly. There are a few reasons for this issue and it may occur multiple times in a day. For example, the Settings app might crash when you are turning on or off contact permissions in the privacy settings, or making changes to the power or battery settings.
What are the Reasons for Settings app Crashes on Windows 11?
The main reason for system Settings app crash is issue with the computer’s registry keys or system files. This can happen when you update your Windows 11 PC, make changes to the system files yourself or file changes made by some apps.
It is relatively easy to fix the Settings app crash in Windows 11. By resetting the Settings app, repairing corrupted system files, and doing a full system repair could fix the problem.
How to Fix Settings App Crash on Windows 11 Closing Itself Issue?
Method 1: Reset or Repair the Settings App
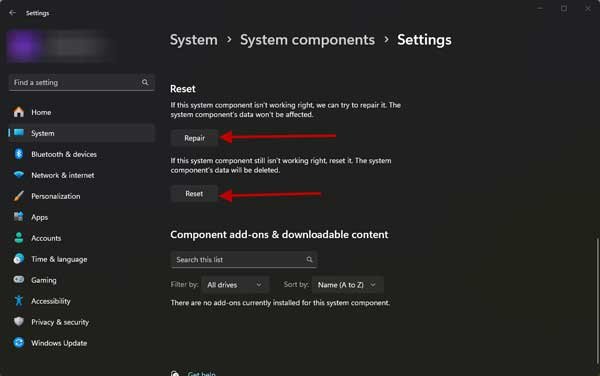
Resetting or repairing Settings app will fix the issue. Here is how to do it.
1. Open the Start menu and type ‘Settings‘ in the search box.
2. In the search results, click on the ‘App Settings‘ option.
3. On the Settings app information page, click the ‘Repair‘ button. This will attempt to fix any problems with the app.
4. If the issue persists after repairing, try the ‘Reset‘ option instead. This should permanently resolve the crashing problem with the Settings app.
Method 2: Repair Corrupt System Files
Windows 11 has a built-in tool called the System File Checker (SFC) to fix corrupted or missing system files. If you’re having issues with the Settings app crashing you can use SFC tool. Here is how to do it.
1. Open the Command Prompt as an administrator. You can do this by searching for “Command Prompt” in the Start menu, then right-clicking on it and selecting “Run as administrator“.
2. In the Command Prompt window, type “sfc /scannow” and press Enter.
3. The SFC tool will now start scanning your system files to look for any issues. This may take a few seconds to complete.
4. If the SFC tool finds any corrupted or missing system files, it will automatically try to restore them.
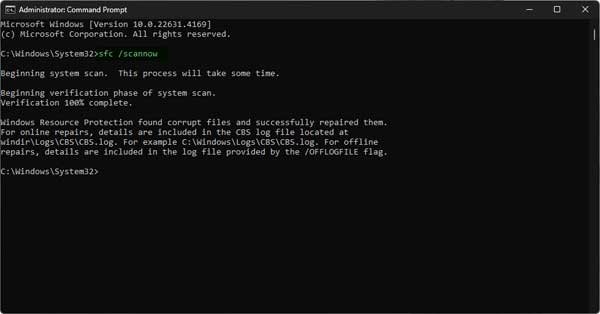
This can help fix problems with the app crash other system issues caused by corrupt files. The SFC tool is a simple and effective way to troubleshoot and repair system files in Windows 11.
Method 3: Enable Sensor Service in Windows 11
Turning on the Sensor Service helps many people to fix the Settings app crashing issue that happens when trying to access or change the power and battery options. Here is how to enable the Sensor Service in Windows 11.
1. Open the Run command box by pressing the Windows key + R.
2. In the Run command box, type “services.msc” and press Enter. This will open the Services Manager.
3. In the Services Manager, scroll down and find the “Sensor Service“.
4. Double-click on the “Sensor Service” to open its properties.
5. In the Sensor Service properties window, change the “Startup type” to “Automatic“.
6. Click the “Start” button to immediately start the Sensor Service.
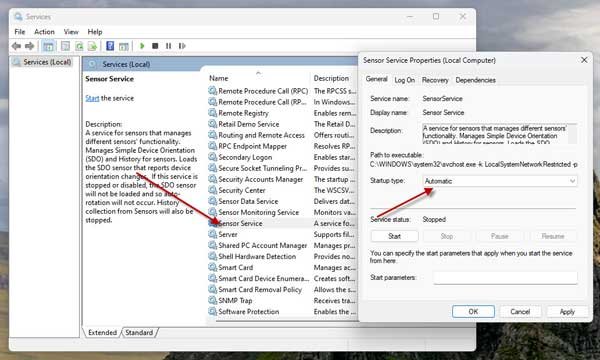
7. Apply the changes and close the Sensor Service properties window.
Now, try to access the Settings app again. The crashing issue should be resolved. If the problem still persists, try the below given method.
Method 4: Repair or Reset Windows 11 Without Losing Data
This is the last method, and it should fix all kinds of issues, including the Settings app crashing on a Windows 11 computer. Windows 11 offers two options to reinstall the operating system without losing your files or needing a USB bootable media. Follow this guide to reset your Windows 11 PC without losing data.
That’s all you need to know to fix the Settings app crash issue on a Windows 11 PC.

