
Google Docs allows you to generate an automatic, clickable table of contents for easy navigation. This feature creates a structured overview of your document’s content based on headings. Readers can click links to jump directly to sections, improving usability and document organization.
If you are a beginner and want to learn how to create a clickable table of contents in Google Docs, this guide will help you. Follow these detailed step-by-step instructions to add an interactive and functional table of contents to your document effortlessly.
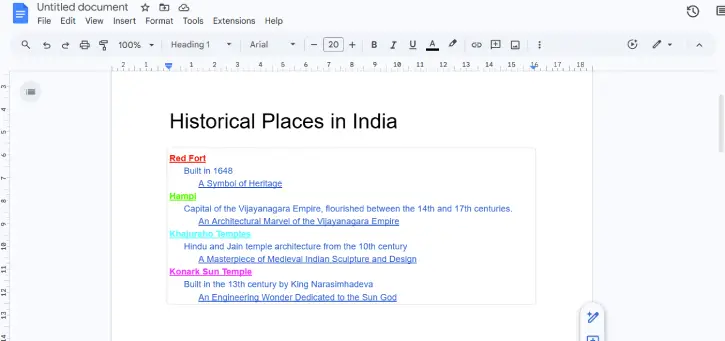
Table of Contents
Steps to Create a Clickable Table of Contents in Google Docs
Creating a clickable table of contents (TOC) in Google Docs is straightforward when you use heading styles throughout your document and then insert a TOC element. Here’s how to do it:
Set Up Your Document Structure
Start by creating a document with a title, headings, subheadings, and descriptions. For example, you might create a document titled “Historical Places in India” with sections for the Red Fort, Hampi, Khajuraho Temples, and the Konark Sun Temple, each with a subheading and description.
Apply Consistent Formatting Styles (Important!)
To ensure your TOC works properly, you need to apply the correct styles to all text in your document:
1. Select all text by going to Edit > Select All or pressing Ctrl + A (Windows) or Command + A (Mac).
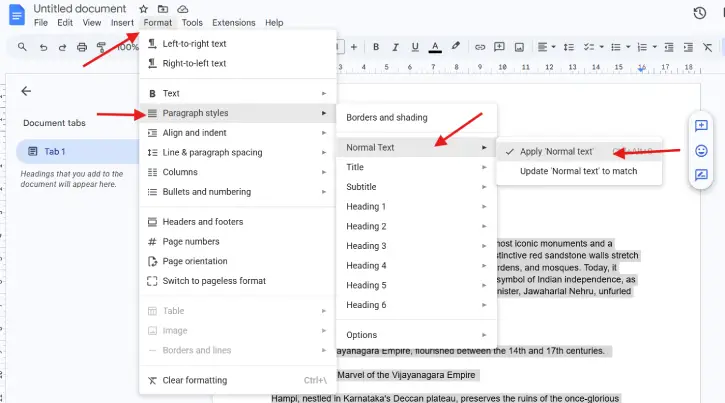
2. Remove existing formatting by clicking Format > Paragraphs and Styles > Normal Text > Apply Normal Text. This clears any inconsistent formatting in your document.
4. Apply the Title style to your document title by selecting it and going to Format > Paragraphs and Styles > Title > Apply Title.
5. Apply heading styles to the remaining text:
- Use Heading 1 for main headings
- Use Heading 2 for subheadings
- Use Heading 3 for any additional nested headings
6. Your document formatting is now complete and ready for a TOC.
ALSO READ: How to Digitally Sign a Google Docs: 4 Easy Methods for Any Document Type
Insert the Clickable Table of Contents
7. Position your cursor where you want the TOC to appear in your document.
8. Click Insert in the menu bar, scroll to the bottom, and select Page Elements > Table of Contents.
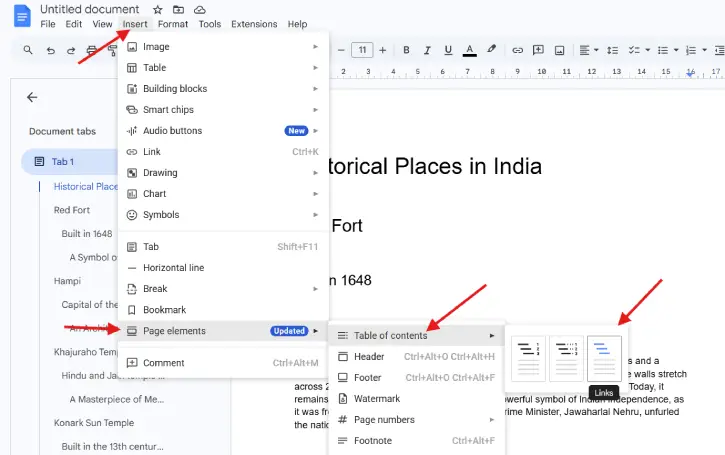
9. Choose a style from the available options: plain text, dotted, or links. Select Links to create a clickable TOC.
10. Google Docs will automatically generate the TOC, pulling headings from your document. Clicking any heading or subheading in the TOC will navigate you directly to that section.
Customize and Update Your TOC
You can customize your TOC with different text colors and formatting styles to match your document’s design.
To update the TOC after making changes to your document, click within the TOC box (in an empty area) and then click the refresh button that appears.
Troubleshooting FAQs
Q: “TOC isn’t showing all headings—why?”
A: The most common cause is inconsistent heading styles. Google Docs only includes text formatted with Heading 1, Heading 2, or Heading 3 styles in the TOC. If you’ve manually bolded or enlarged text without applying actual heading styles, it won’t appear.
Q: “How to fix a TOC that won’t update?”
A: Google Docs usually updates the TOC automatically, but if it doesn’t, click inside the TOC box (in an empty area between the text) and click the refresh icon. If changes still don’t appear, ensure you’ve applied heading styles to new sections—unformatted text won’t be included in the refresh.
Conclusion
A clickable table of contents in Google Docs will improve document navigation and readability, especially for longer documents with multiple sections. By following these straightforward steps—properly formatting your headings, inserting the TOC element, and choosing your preferred style—you can create a professional, user-friendly document that allows readers to jump directly to the sections they need.