

The Windows Snipping Tool now enables users to create animated GIFs, eliminating the need for third-party applications or online tools. This guide will show how to turn on this feature and make GIFs using the Snipping Tool on Windows 11.
The Snipping Tool app for Windows 11 now has an option to make animated GIFs from screen recordings. Even though the options are simple now you can make GIFs that last up to 30 seconds with a speed of 12 frames every second using the tool.
The GIF making feature is available in Snipping Tool version 11.2505.21.0 and newer. Currently, this feature is available for Windows Insiders who use the Canary, Dev and Beta channels of Windows 11 and it will come to more users over time.
If you haven’t received this feature yet, you can activate it manually using a tool called ViveTool. Here is how to do it.
How to Enable GIF Creation on Windows Snipping Tool?
1. Download the ViveTool-vx.x.x.zip file from GitHub and unzip it in a folder.
2. Next, copy the file path of the extracted folder.
3. Open Command Prompt as Administrator.
4. Type cd c:\folder\path\ViveTool-v0.x.x (type cd and paste the copied path) and press Enter key.
5. Now, execute the commands: vivetool /enable /id:47081492
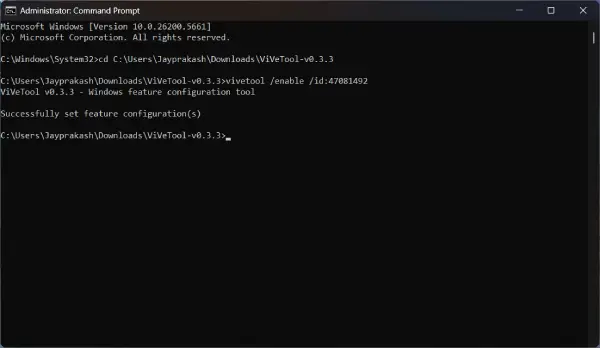
6. After executing the command, restart the computer. You will now be presented with the new Start menu.
[To disable this feature, execute the command vivetool /disable /id:47081492 and restart the PC]
How to Create GIF image Using Snipping Tool on Windows 11
1. First, open the Snipping Tool (“Print” key is the default shortcut key to launch it).
2. Choose the Recording option (You can also use the “Windows key + Shift + R” shortcut key to launch the recording tool).
3. Next, select the area to record with the mouse and click Start button.
4. Once recorded, click the Stop Recording button.
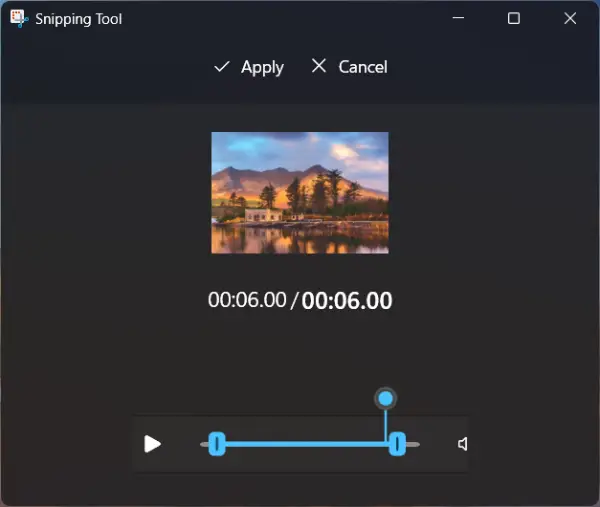
5. Now, click the Trim button to trim the video to required length and clik Apply.
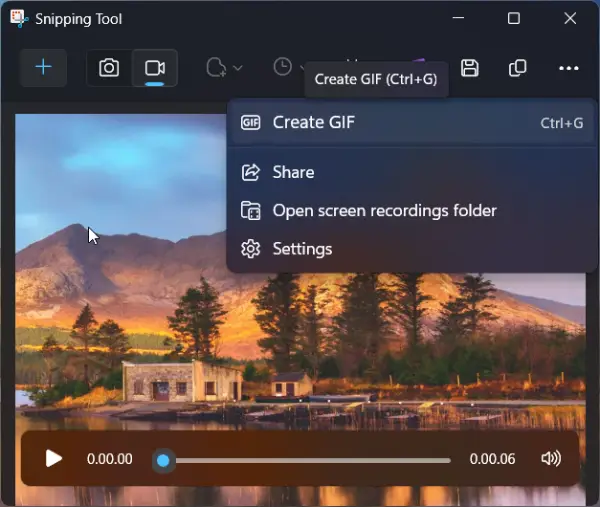
6. Click the three dots menu at the top-right corner and select Create GIF option.
7. Choose the GIF quality “Low” or “High” and click the Export button.
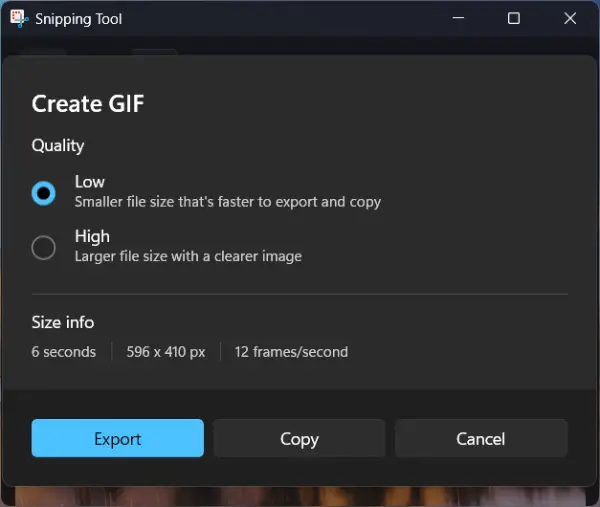
8. Once you complete the steps, the GIF will be saved on your computer for sharing.
Note: If your recording exceeds 30 seconds, the Snipping Tool will only allow you to export the first 30 seconds.
Conclusion:
Animated GIFs are widely used for expressing emotions, humor, and reactions in digital communication. They enhance social media posts, emails, and messaging apps by adding visual interest and conveying messages quickly. Their looping nature makes them engaging and easily shareable across various platforms.

