

In this guide, you will learn how to create hidden folders on the Windows 11 desktop without using any third-party software. You can use these hidden folders to protect sensitive files and declutter your workspace. Because this method does not use a password, it is not truly secure against determined users. Follow our step‑by‑step guide for simple techniques.
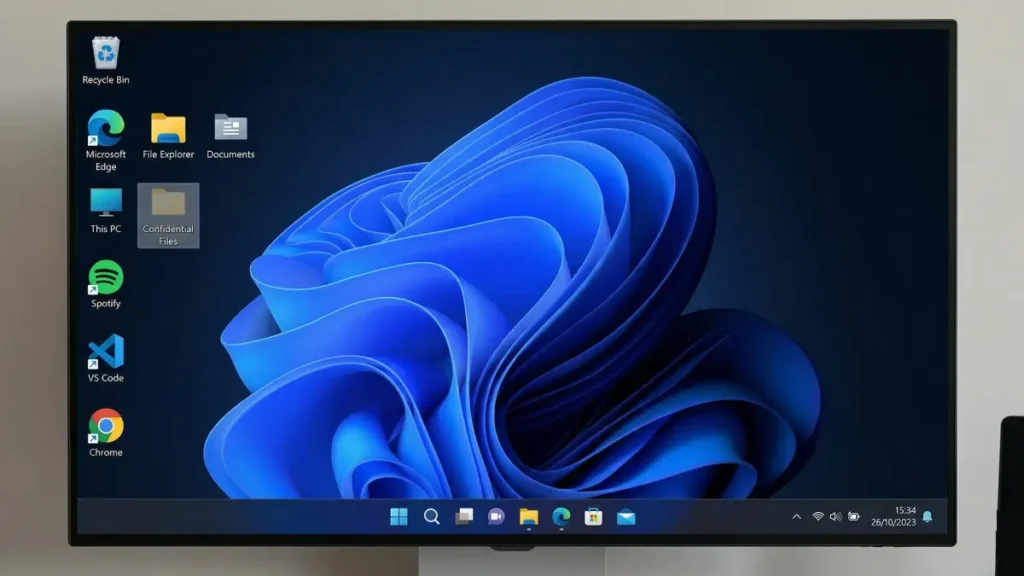
Creating hidden folders on your Windows 11 desktop has few advantages. You can protect personal and important files from unwanted access, adding an extra layer of privacy to sensitive documents. Hidden folders can also help declutter your desktop, allowing you to maintain a clean desktop.
Step-by-Step Guide to Create an Invisible Folder on Windows 11
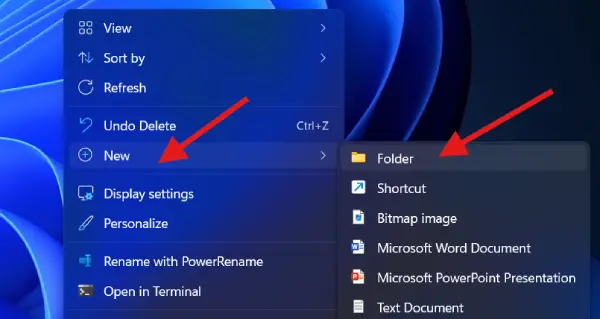
Step 1: Right-click on your Windows 11 desktop and select New, then choose Folder. A new folder will appear on your desktop ready for customization.
Step 2: Hold the Alt key and type 255 on the numeric keypad. This creates a folder with an invisible name—a trick that makes the folder appear blank to the eye.
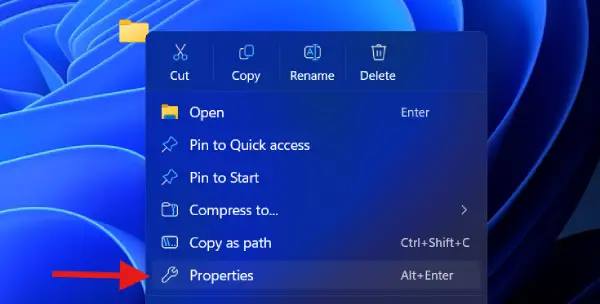
Step 3: Right-click on your new folder and select Properties from the context menu.
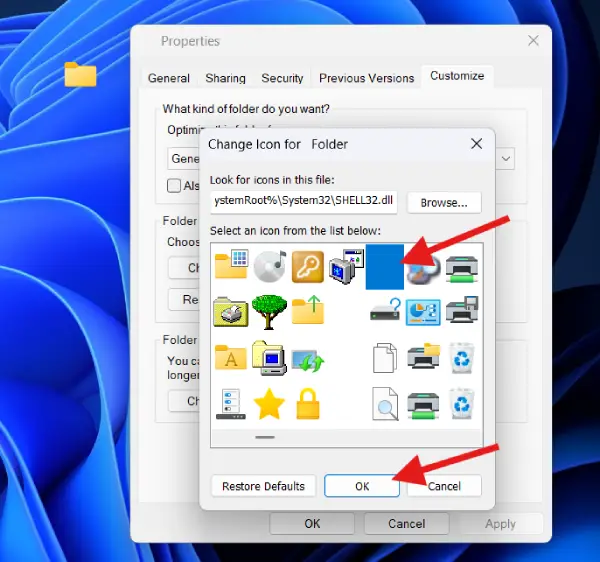
Step 4: Navigate to the Customize tab and click on Change Icon. This opens the icon selection menu.
Step 5: Choose a hidden box icon (blank) from the available options and click OK, then click Apply to confirm your changes.
Step 6: Your folder will now vanish from your desktop view, though it remains in the same location.
ALSO READ: How to Add Control Panel to the Right-Click Menu in Windows 11
How to Access Your Hidden Folder
Even though your folder is invisible, accessing it is straightforward:
To view it: Simply highlight or select the area where the folder is located on your desktop

To open it: Double-click on the highlighted area to access the folder and view the files inside
To permanently show it again: Right-click the folder and change its properties back to a visible icon
FYI, hiding folders does not delete them—they simply remain invisibly stored on your desktop. The files inside remain fully intact and accessible only to those who know the trick to reveal them.
Alternative Methods for File Protection
While the invisible folder method works well for desktop organization, you can use these alternatives for enhanced security:
- Use the built-in File Explorer hidden attribute for system-level folder hiding (visible in File Explorer if you enable “Show hidden files”)
- Encrypt sensitive folders using Windows BitLocker or third-party encryption software
- Create a password-protected folder for critical documents requiring stronger security
Final Thought
Hidden folders created using the Alt+255 shortcut method offer a quick, visual solution for desktop organization, but they’re not truly secure against determined users. For highly sensitive information, combine this method with password protection or encryption.

