Have you noticed an unusual process, VmmemWSA, in the task manager that consumes unusually high memory on your Windows 11 system? The VmmemWSA process is a system process that is associated with the Windows Subsystem for Android (WSA).
Microsoft released the WSA for Windows 11 a few years back, which allows you to run and install Android apps on your PC. The VmmemWSA is responsible for managing the memory and resources used by Android applications running on your Windows computer. If VmmemWSA eats up your RAM and slows down your PC, here is how to stop the process.
Table of Contents
Why is the VmmemWSA Process Running?
The VmmemWSA process is typically running in the background when you have installed an Android emulator or virtual machine on your Windows computer. It allows you to run Android applications without the need for a physical Android device.
Stopping the VmmemWSA Process
If you want to stop the VmmemWSA process, you can do so by following these steps:
- Open the Task Manager by pressing Ctrl + Shift + Esc.
- Click on the “Processes” tab.
- Scroll down and look for the “Vmmemwsa” process.
- Right-click on the process and select “End Task” or “End Process”.
It’s important to note that stopping the VmmemWSA process may cause any running Android applications or virtual machines to stop functioning properly. If you no longer need to use Android applications or virtual machines, you can uninstall the emulator or virtual machine software to permanently stop the VmmemWSA process.
NOTE: Microsoft is ending support for Windows Subsystem for Android. It means WSA and Amazon AppStore won’t be available in the Microsoft Store after March 5, 2025.
Turn Off or Restart Windows Subsystem for Android
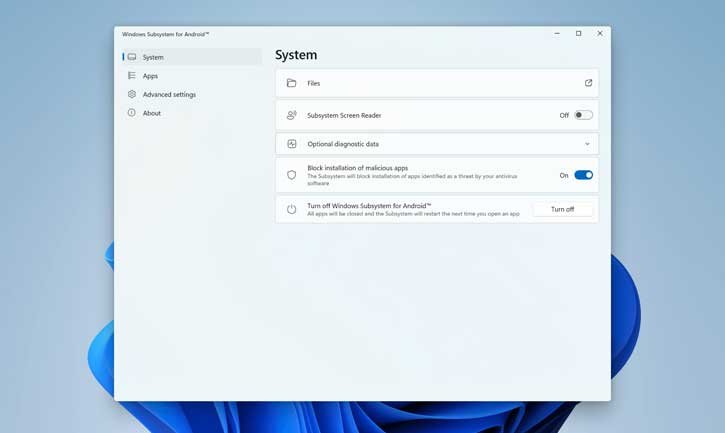
If VmmemWSA is eating up excessive memory (RAM) on your Windows 11 PC even after stopping the processes, disabling or restarting the WSA app will help you fix the issue. To do so, follow the instruction below.
- Open the Windows Subsystem for Android app on your PC from the Start menu.
- Click the ‘Turn off’ button next to the ‘Turn off Windows Subsystem for Android’ menu.
- Now, to restart WSA, either launch an Android app installed on your PC or relaunch the WSA app itself.

How to Uninstall Windows Subsystem for Android (WSA)?
Since Microsoft decided to stop support for Windows Subsystem for Android, there will not be any issue uninstalling the WSA app on your PC.
- Open the Settings App, then go to Apps and select Installed Apps.
- Scroll down the list, can you find the Windows Sub-system for Android installed there.
- Click the three-dots menu next to WSA and click Uninstall option.
- Restart your Windows 11 PC to remove VmmemWSA process from task manager.
Remember, the VmmemWSA process is a necessary component for running Android applications on your Windows computer. Stopping it may impact the functionality of any Android-related software you have installed.
