If you’re experiencing incorrect, damaged, or duplicate icons on your Windows 11 computer, there’s no need to be concerned—it’s likely due to corrupted icon cache files. The icon cache is essential for speeding up the loading and display of icons, and when these files become corrupted, it can lead to incorrect icon display issues.

In this guide, we’ll provide you with clear steps to rebuild the icon cache file on Windows 11 and effectively resolve this problem. There are a couple of methods to rebuild the icon cache in Windows 11, and we will explain each one in detail. These methods will also be applicable to Windows 10.
Table of Contents
How to Rebuild Icon Cache File in Windows 11?
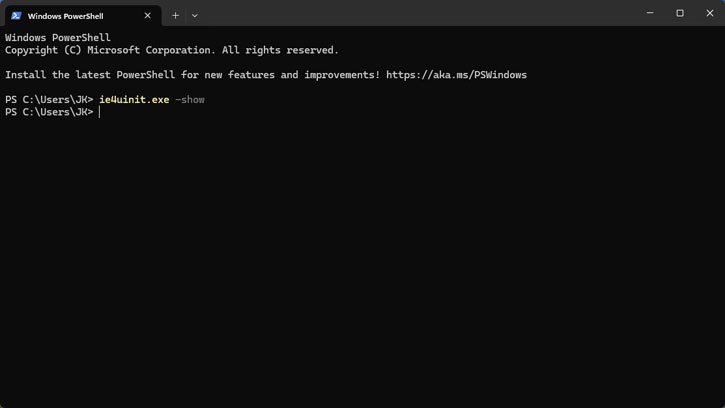
You can rebuild the icon cache by using the command ie4uinit.exe -show. If this method does not resolve the issue, you can try the Sledgehammer method, which is a more robust approach and is likely to fix the problem.
First Method: Refresh Icon Cache File Using a PowerShell
1. Open the PowerShell (press Win + X and select Terminal from the menu).
2. Next, enter the command ie4uinit.exe -show and press Enter.
3. It will rebuild entire icon cache in Windows 11.

4. You may not get a response when executing this command, but this is normal.
Second Method: Refresh Icon Cache Using Command Prompt (Advanced Method)
1. Open Command Prompt as an administrator and execute the below commands.
2. Type the command ie4uinit.exe -show and press Enter.
3. Next, enter the command taskkill /IM explorer.exe /F and press Enter.
4. Type CD %userprofile%\AppData\Local and press Enter.
5. Now, type del iconcache.db /a and press Enter.
6. Next, type CD %localappdata%\Microsoft\Windows\Explorer\ and press Enter.
7. Finally, type del iconcache* and press Enter.
8. Type start explorer.exe and press Enter.
These commands will help fix the corrupted icon cache files, allowing icons to display correctly on your Windows 11 and Windows 10 systems.
Now, let us explain what are the above commands do on your Windows 11.
ie4uinit.exe -show: This command refreshes the icon cache and can help resolve minor display issues with icons.
taskkill /IM explorer.exe /F: This command forcefully closes the Windows Explorer process. Windows Explorer is responsible for displaying the desktop and file management, and restarting it is often necessary when making changes to the icon cache.
CD %userprofile%\AppData\Local: This command changes the directory to the Local AppData folder of the current user. This folder contains various application data, including the icon cache files.
del iconcache.db /a: This command deletes the file named iconcache.db, which stores the icon cache. Removing this file is essential for rebuilding the icon cache.
CD %localappdata%\Microsoft\Windows\Explorer\: This command changes the directory to the Explorer folder within the Local AppData. This folder contains additional icon cache files.
del iconcache*: This command deletes all files that start with “iconcache” in the current directory. This ensures that any remaining corrupted icon cache files are removed.
start explorer.exe: This command restarts the Windows Explorer process, allowing the system to rebuild the icon cache with fresh data.
By executing these commands, you effectively clear out any corrupted icon cache files, which should help resolve issues with how icons are displayed on your Windows 11 system.
Rebuilding Icon Cache Not Fixing the Issue
Rebuilding the icon cache is an effective solution for issues caused by corruption in the cache itself. However, it does not fix all problems related to icons.
For instance, if an icon file has been moved to a different location or deleted from the system, rebuilding the icon cache will not resolve the issue. In such cases, the system may still display incorrect or missing icons because it cannot find the original files. Therefore, while rebuilding the icon cache can help with certain display problems, it may not address issues stemming from changes to the actual files associated with those icons.
