
Corrupt, outdated, or incompatible device drivers can severely impact your Windows 11 system, causing performance slowdowns, device malfunctions, and unexpected crashes. Simply uninstalling a driver through Device Manager often leaves behind registry entries and system files that continue to cause problems. This comprehensive guide shows you how to completely remove device driver leftovers from Windows 11 in six straightforward steps.
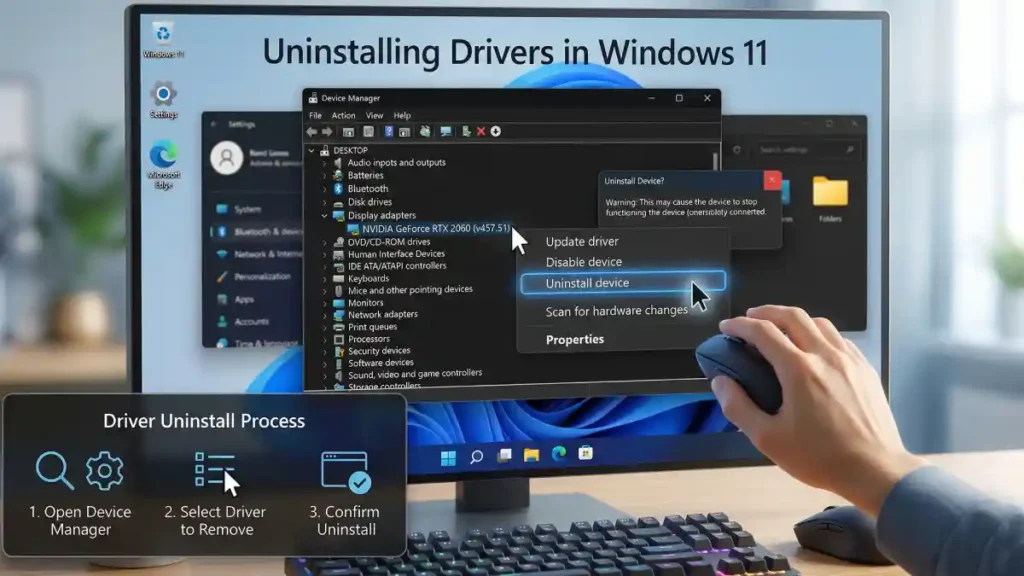
Table of Contents
Why Standard Device Manager Uninstallation Fails
When you uninstall a driver through Windows Device Manager alone, the operating system removes only the active driver files. Three critical locations may still contain leftover driver data:
- Device Manager (the visible interface)
- System32 folders (the actual driver files)
- Windows Registry (the configuration database)
These remnants can cause conflicts with new drivers, system instability, BSOD issues, and performance issues. A complete uninstallation requires removing drivers from all three locations.
Important: Before removing any drivers, create a System Restore point to protect your system. This allows you to revert changes if something goes wrong.
To create a restore point:
- Press Windows + R, type
systempropertiesprotection, and press Enter - Under System Restore, click Create and follow the prompts
- Wait for the restore point to complete before proceeding
Complete Step-by-Step Driver Removal Process
Step 1: Open Device Manager and Locate the Problematic Driver
- Right-click the Start button and select Device Manager
- Locate the problematic driver in the device list (drivers are organized by category: Display adapters, Network adapters, Sound/video/game controllers, etc.)
- Take note of the device name for reference
Step 2: Gather Detailed Driver Information
This step is critical – write down the exact driver details before removal.
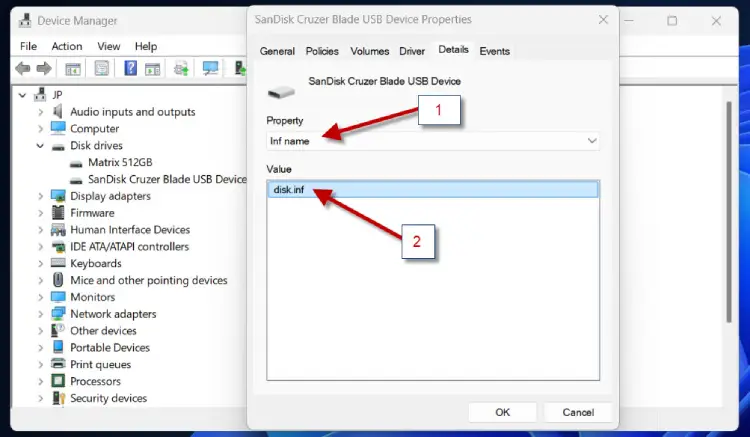
1. Double-click the driver to open its Properties window and then click the Details tab
2. Click the Property dropdown menu and select Inf name. Write down the exact filename (appears as something like oem0.inf)
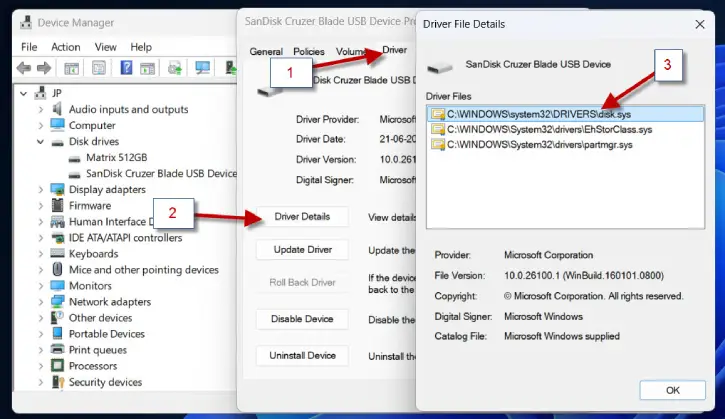
3. Switch to the Driver tab and click Driver Details and note down the following information:
- Driver filename with .sys extension (e.g., nvlddmkm.sys)
- Full file location path
- Take screenshots of these details—you’ll need them in later steps
Step 3: Uninstall the Driver from Device Manager
- Return to Device Manager
- Right-click the driver and select Uninstall device
- A confirmation dialog appears—click Uninstall to proceed
- Windows removes the active driver from your system

Note: This step only removes the active driver, not the leftover files.
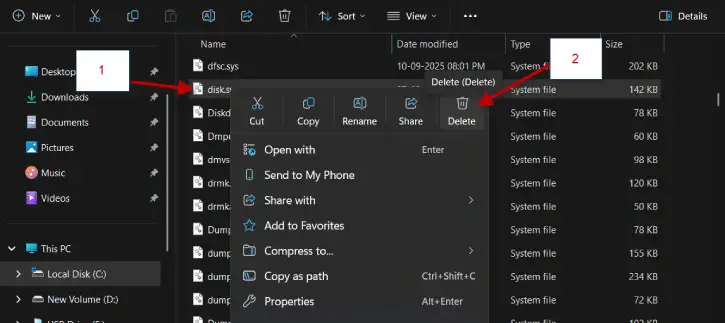
Step 4: Delete Driver Files From System32
This step removes the actual driver files Windows leaves behind.
1. Open File Explorer and navigate to: C:\Windows\System32\drivers
2. Search for the driver filename (with .sys extension) from Step 2
3. If found, right-click the file and select Delete
If Windows prevents deletion:
- The file is still in use by the system
- Restart your computer in Safe Mode and repeat this step
- Safe Mode prevents driver files from loading, allowing deletion
Step 5: Remove Driver Installation Files From DriverStore
The DriverStore folder contains the complete driver package.
1. Navigate to: C:\Windows\System32\DriverStore\FileRepository
2. Look for a folder matching your INF filename from Step 2 [Example: If your INF was oem0.inf, search for folders starting with oem0]
3. Right-click the matching folder and select Delete
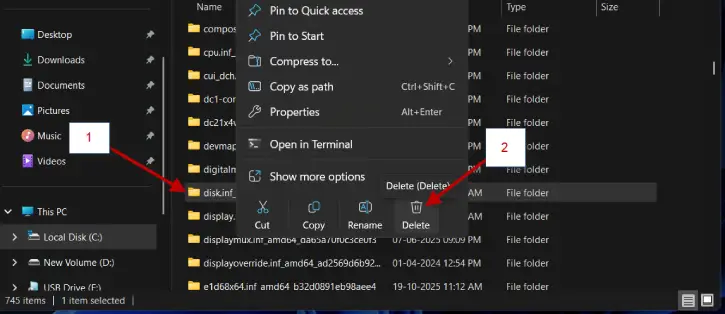
4. Confirm the deletion when prompted
Step 6: Clean Registry Entries (The Final Step)
This is the most critical step – removing registry entries prevents driver conflicts.
1. Press Windows + R, type regedit, and press Enter
2. Navigate to: HKEY_LOCAL_MACHINE\SYSTEM\DriverDatabase\DriverPackages
3. Expand this folder
4. Look for a sub-key matching your INF filename from Step 2
5. Right-click the matching folder and select Delete
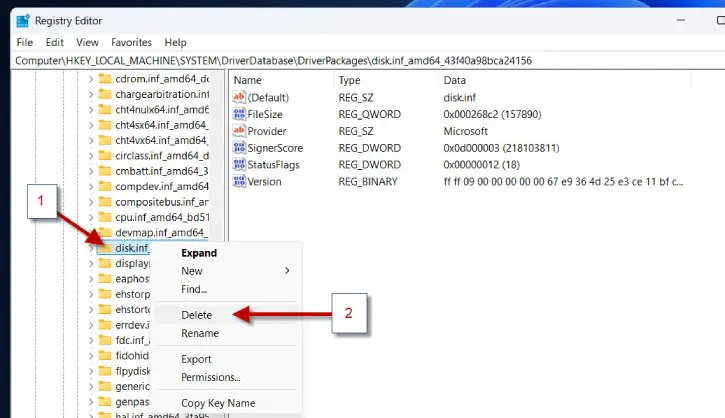
6. Confirm the deletion when prompted
⚠️ Warning: Registry editing is powerful but risky. Only delete entries you’ve positively identified as belonging to the driver you’re removing. Deleting wrong entries can destabilize your system. When in doubt, leave it alone.
ALSO READ: How to Fix Driver Installation Failures on Windows 11: 6 Working Solutions
How to Confirm Complete Driver Removal
After completing all six steps, verify that the driver has been completely removed:
- Restart your computer normally (not in Safe Mode)
- Open Device Manager again
- Search for the driver name – it should no longer appear
- Check Device Manager for any yellow exclamation marks (indicating unknown or conflicting devices)
- If the problematic device is gone, the removal was successful
When to Use Professional Driver Removal Tools
For users uncomfortable with manual registry editing, professional driver removal tools offer automated alternatives:
- Display Driver Uninstaller (DDU) – Specializes in GPU driver removal (Go to Intel website to download the program)
- Driver Sweeper – Removes leftover driver files and registry entries
- Revo Uninstaller Pro – Comprehensive driver cleanup with safety features
- These tools automate Steps 4-6 but still require the same initial preparation (System Restore point, gathering driver information).
FAQs
Issue: Windows Won’t Let Me Delete the Driver File
Solution: The driver is still loaded in memory.
- Restart in Safe Mode (press F8 during startup or use Settings > Recovery > Restart now)
- Attempt deletion again
- Restart normally when complete
Issue: Device Still Appears in Device Manager After Removal
Solution: Registry entries weren’t fully deleted.
- Repeat Step 6, ensuring you’ve found the correct INF sub-key
- Search the entire Registry for the INF filename using Edit > Find
- Delete all matching entries
Issue: New Driver Won’t Install After Removal
Solution: Some leftover files remain.
- Restart your computer
- Attempt installation again
If still failing, use a professional driver removal tool (DDU or Driver Sweeper)
Key Takeaways
Completely removing device drivers from Windows 11 requires removing files from three locations:
- Device Manager (the interface)
- System32 and DriverStore folders (the driver files)
- Windows Registry (the configuration database)
Always create a System Restore point before beginning, gather driver information before uninstalling, and verify removal by restarting and checking Device Manager. For complex situations, professional driver removal tools provide safer automated alternatives.
By following this complete guide, you’ll eliminate every trace of problematic drivers and restore stability to your Windows 11 system.