
Microsoft Word is an excellent tool for designing and printing custom name stickers at home or in an office. It is simple and easy, and it allows you to create professional-looking stickers without needing specialized design software. In this guide, let us learn how to create name stickers in MS Word.
Name stickers are useful things that work well in many different places. In schools, teachers and students use them to label belongings and keep classroom materials organized. Parents at home put them on lunch boxes, water bottles, clothing tags, and school supplies to make sure nothing gets lost. At work, people use name stickers on desk nameplates, folders, and shared equipment to identify who owns what. Businesses also use them to display their brand, and label products.
Table of Contents
How to Create Name Stickers in MS Word (Step-by-Step)
Step 1: Set Up Mail Merge for Labels
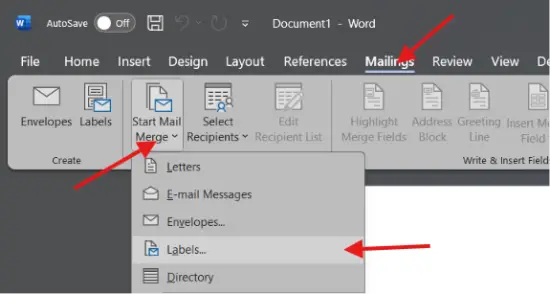
a) Open a blank document in Word and click the Mailings tab.
b) Next, click the Start Mail Merge drop-down menu and select Labels.
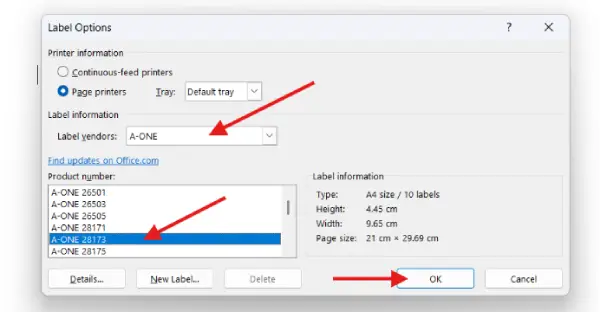
c) In the Labels dialog box, configure the following settings:
- Label vendors: Select A-ONE
- Product number: Select A-ONE 18173
- Click OK
Step 2: Select a Page Grid
After confirming your label settings, select a page grid that matches your label sheet layout. Word will display the label template on your page.
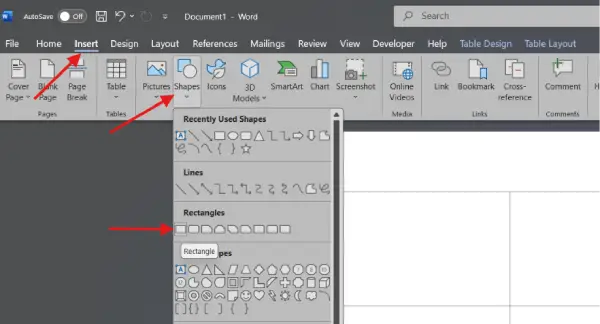
Step 3: Add a Background Shape
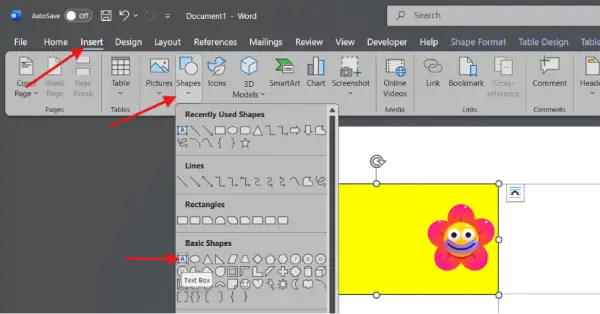
Click the Insert tab and select Shapes. Choose a square or rectangle shape and draw it to fill the entire first label area. This will serve as the background for your sticker.
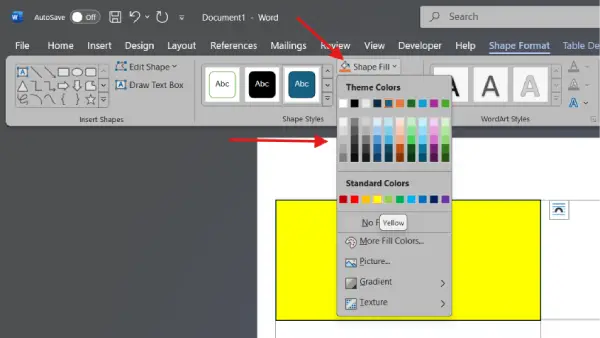
To set the background color, click the Shape Fill dropdown menu and choose your desired color. You can also select Shape Outline to add a border if desired.
Step 4: Insert an Image
Once the background shape is complete, you can add an image to the sticker. Select the Insert tab, click the Pictures dropdown menu, and choose one of the following options:
- This Device – to upload a PNG image from your computer
- Stock Images > Stickers – to select a pre-designed sticker

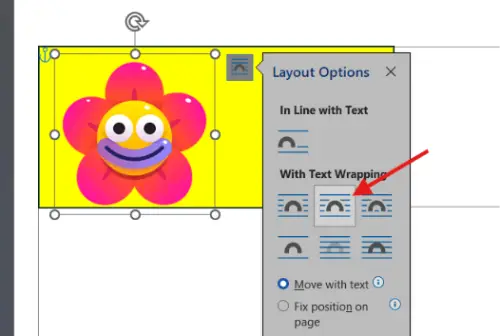
Position the image by clicking and dragging it to your preferred location within the label. If needed, right-click the image, select Wrap Text, and choose In Front of Text or Behind Text to layer it properly with other elements.
Step 5: Add a Text Box with Information
From the Insert tab, select Text Box. Draw the text box in the center of the label, positioning it where you want the name or information to appear.
Type the desired information in the text box (name, subject, class, division, title, etc.).
Step 6: Format the Text
Select the text and format it as follows:
- Choose your preferred font from the Home tab
- Adjust the font size to ensure it fits well within the label
- Select your desired text color (typically contrasting with your background color for readability)
- Center the text by clicking the center alignment button in the Home tab
Step 7: Customize the Text Box Appearance
Right-click the text box and select Shape Outline. Choose one of the following:
- No Line – to remove the visible border
- Solid line with your chosen color – to add a border that complements your design
- This step ensures your sticker has a polished, professional appearance.
Step 8: Replicate the Design Across All Labels
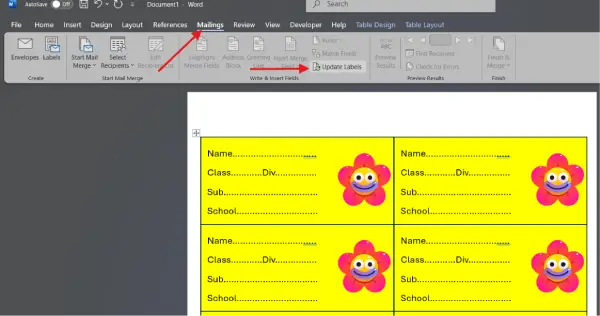
Once you are satisfied with the design of the first label, go to the Mailings tab and click Update Labels. This will automatically replicate your design -including the shape, image, and text box – across all label columns on the page.
Step 9: Print Your Stickers
After updating all labels, review the page to ensure all stickers match your desired design. Then print your labels on the A-ONE 18173 label sheets using your printer.
Conclusion
Creating custom name stickers in Microsoft Word is an affordable, accessible way to add a personal touch to belongings, classroom materials, and office items. With these nine straightforward steps, you can design professional-looking stickers in minutes – no design experience required. Start designing your stickers today and see how they can help bring order and personality to your space.