

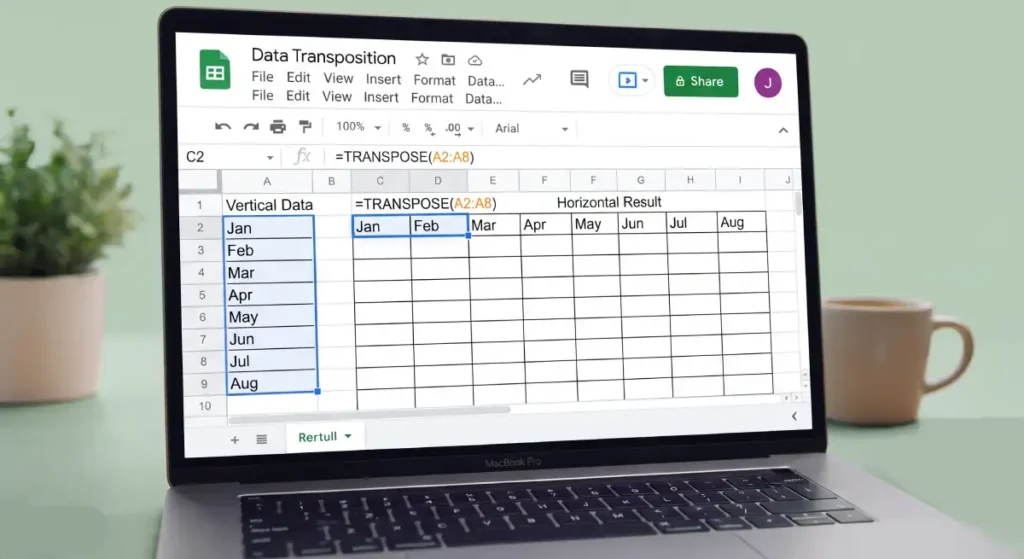
Converting rows to columns (and vice versa) in Google Sheets is simple. If you’ve ever needed to convert rows to columns or columns to rows, Google Sheets has built-in features called Transpose that make this task incredibly easy.
You can convert spreadsheet table rows to columns and vice versa either via the Transpose menu or TRANSPOSE function. Let me walk you through both methods I use regularly.
What Is Transpose in Google Sheets?
Transpose is the process of converting a vertical table layout into a horizontal one—or vice versa. Essentially, you’re switching rows and columns so your data is organized the way you actually need it. Google Sheets‘ this feature is a lifesaver when you receive data in the wrong orientation.
Method 1: Using the Transpose Paste Special Option
This is the quickest way to transpose your data if you don’t need it to update automatically.
Step-by-step instructions:
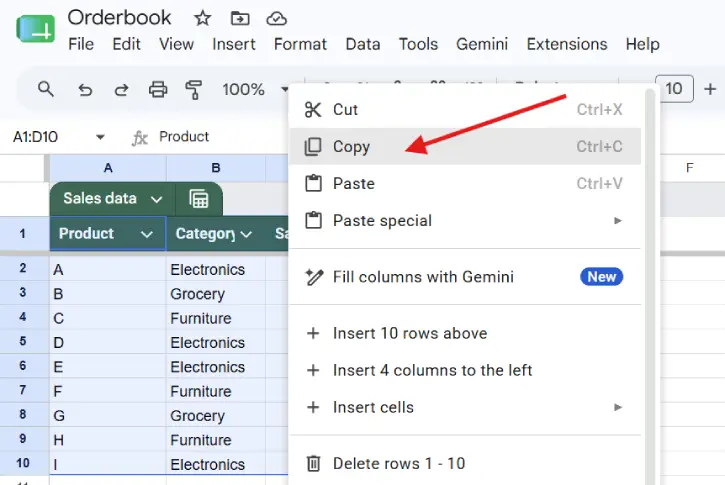
1. Select your data — Click and drag to highlight the entire range you want to transpose, including headers.
2. Copy the selection — Press Ctrl+C (or Cmd+C on Mac), or right-click and select Copy from the menu.
3. Choose your destination — Create a new sheet or navigate to where you want your transposed table to appear.
4. Select the starting cell — Click the leftmost cell where your new table will begin.
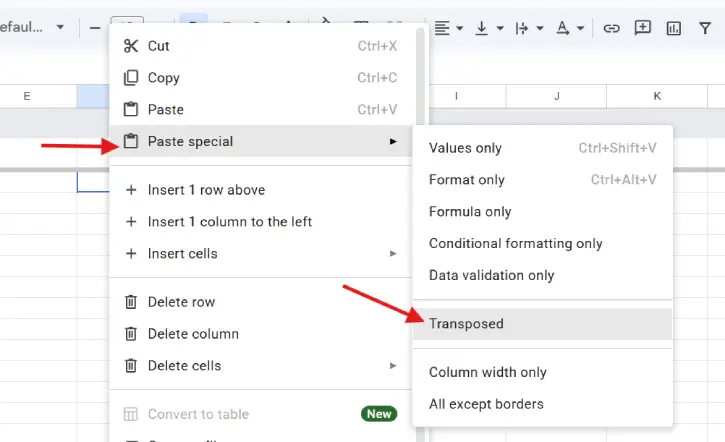
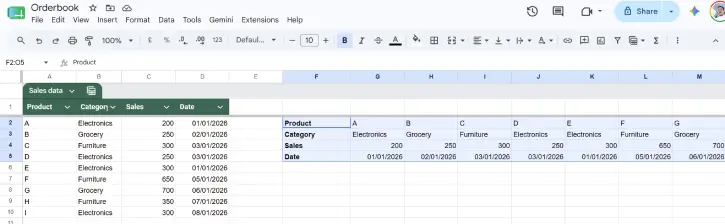
5. Paste special — Right-click and select Paste special > Transposed. Your data will instantly appear with rows and columns switched.
That’s it! Your table is now reorganized exactly how you need it.
Method 2: Using the TRANSPOSE Function
If you want your transposed data to automatically update whenever you change the original table, the TRANSPOSE function is your answer.
How to use it:
1. Click on the cell where you want your new table to start.
2. Enter this formula: =TRANSPOSE(A1:D10)
[Replace A1:D10 with the actual range of your data.]
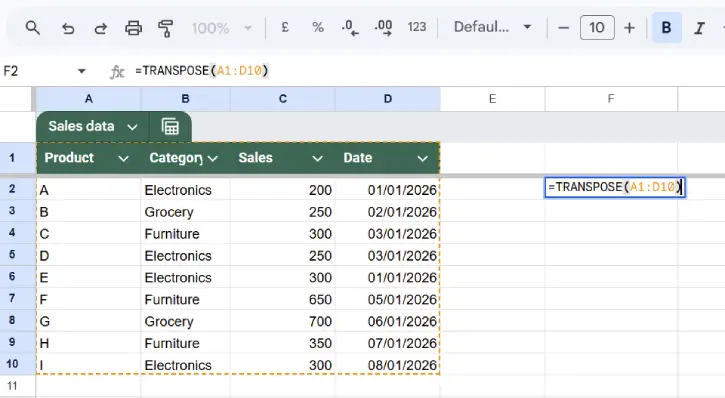
3. Press Enter, and your transposed table will appear instantly.
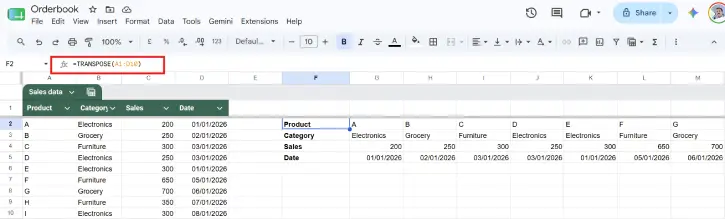
Why I prefer the second method:
The TRANSPOSE function creates a live connection between your original data and the transposed version. Change something in your source table, and the transposed table updates automatically. With the Paste Special method, you’re essentially creating a static snapshot that won’t change if the original data does.
Which Method Should You Use?
Use Paste Special if:
- You only need a one-time transpose
- You don’t expect the original data to change
- You want a permanent, independent copy
Use TRANSPOSE function if:
- Your data changes regularly
- You need the transposed table to stay in sync with the original
- You want a dynamic, formula-based solution
Final Thoughts
Both methods eliminate the tedious manual work of reorganizing data cell by cell. Whether you prefer the simplicity of Paste Special or the flexibility of the TRANSPOSE function, Google Sheets has made switching rows and columns painless. Try both methods on your next project and see which workflow feels more natural to you.

